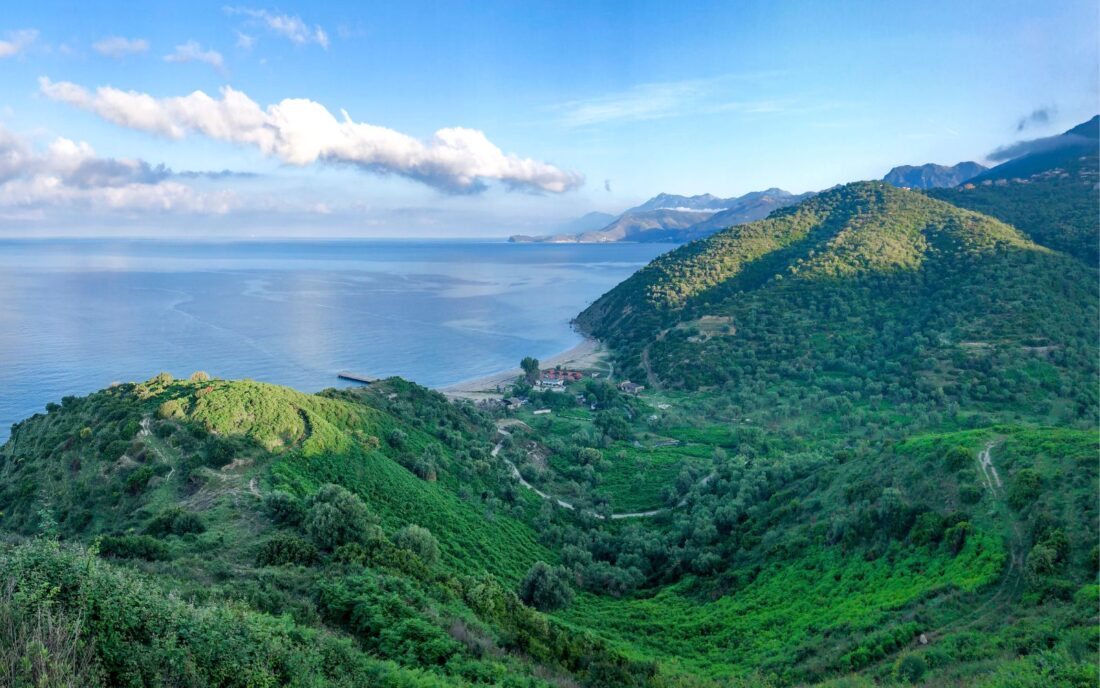
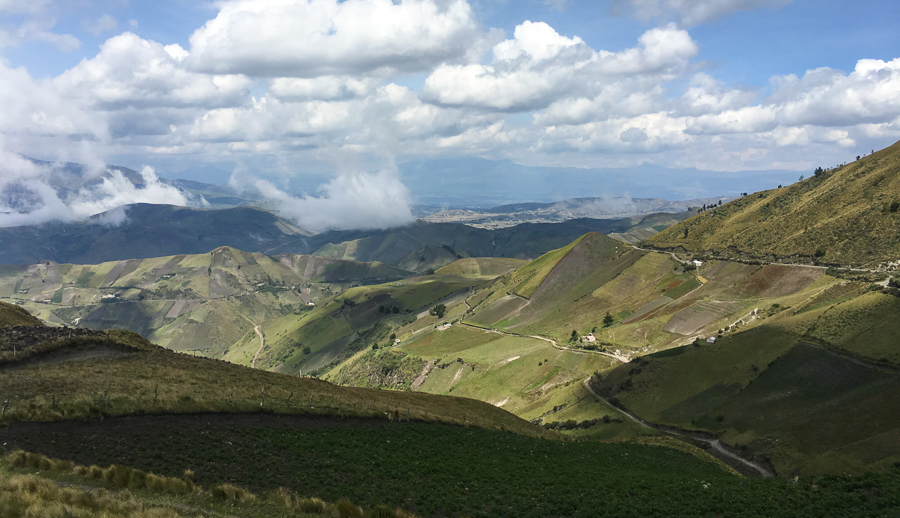
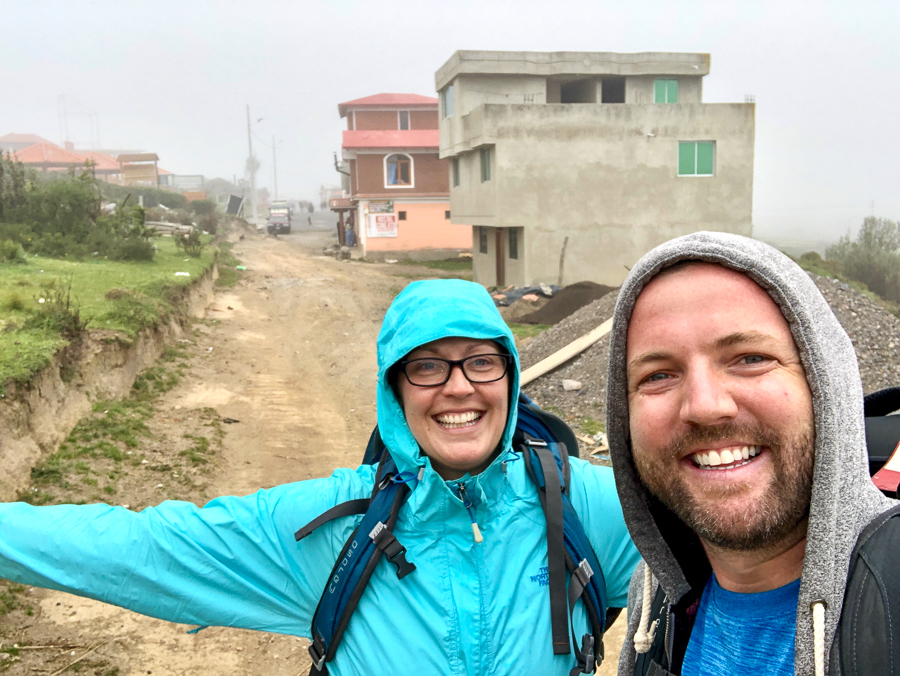
If you love trekking through peaceful, pristine nature, then you won’t want to miss the Quilotoa Loop in the Central Highlands of Ecuador. As soon as I saw images of the glistening Laguna Quilotoa (Quilotoa Lake) online, I knew we had to visit. But, we didn’t want to simply drive to the lake – which sits at 3,914 m (12,841 ft) – we wanted to hike to it, and have the view as our reward for our efforts!
Every travel blog, guidebook, and traveller we spoke to said that we’d most likely get lost while trying to navigate the Quilotoa Loop. And, even though we love hiking and have done numerous independent treks, we get lost — often. Not only that, but the more research we did about the “loop”, the more we were confused because it didn’t seem to really be a loop after all.
We had to give it a try, regardless of what might happen.
The Quilotoa Loop is an adventure in Ecuador we didn’t want to miss — in fact it ended up being a highlight of our entire trip to the country. Read on for how to trek to Laguna de Quilatoa, what to pack, the best route, where to stay during the Quilotoa Loop, our top tips and more.
This post will help to demystify this amazing trek in Ecuador.
Jump To:
- What Is The Quilotoa Loop?
- Which Route is The Best?
- Tips For Trekking to Quilotoa Lake
- What to Pack For The Quilotoa Loop
- Accommodation on the Loop
- Trekking Itinerary
What Is The Quilotoa Loop?
The Quilotoa Loop is a beautiful hiking area in the Central Highlands of Ecuador and if you’re into nature and being “out there”, then this is an adventure you’ll want to embark on.
However, the name is misleading. The Quilotoa Loop isn’t exactly a loop, it’s more of an oddly shaped, circle’ish route, with a portion of it for trekking, and a portion for driving. There are a few ways to do the trek — there’s no right way or wrong way.
The main villages of interest for tourists on the trek include:
- Latacunga – the starting point of the Quilotoa Loop (for some travellers)
- Tigua – views of Cotapaxi Volcano on the way here, farming and painting community
- Zumbahua – pretty landscapes, and a Saturday market
- Quilotoa – highest elevation on the loop, Quilotoa Lake, lots of shops and accommodation
- Shalala – on the edge of the crater lake, with a lovely lodge
- Chugchilán – Andean village, great hiking, cheese factory, horseback riding
- Sigchos – mostly a transit place for tourists, the start of the loop trek for some
- Isinliví – beautiful views, peaceful village, hiking, and good tourist accommodations
- Saquisilí – known for its authentic Thursday market (animal market included)
Which Route Is The Best?
Where you start the loop depends entirely on your travel itinerary, how much time you have, and how far you want to hike. Your first stop in the region is likely to be Latacunga. You won’t start your hike from here, but there are plenty of buses to take you to the numerous starting points along the trek.
The good thing about the Quilotoa Loop is that you always arrive in a village for the night, so if you wanted to, you could take a bus out of the loop at any time.
I recommend considering which markets and sights you want to see (and which days they are on), and whether or not there are any side trips/day trips that you want to do from each village. Once you’ve figured that out, you can then go ahead and start plotting your route.
If we had more time, we would’ve stayed longer in the villages on the loop — they were so peaceful, and there were a few side trips and hikes we would’ve liked to have done.
You can choose to hike clockwise, or counterclockwise.
Hiking the Quiotoa Loop Clockwise
If you choose to hike clockwise, your Quilotoa Loop trek will most likely look like this:
Latacunga ⇢ Quilotoa ⇢ Chugchilán ⇢ Isinliví ⇢ Sigchos ⇢ Latacunga
After completing this trek in Sigchos, there are numerous buses from Sigchos to Latacunga, or you can even take a hired truck.
With this clockwise route, you’ll start in Latacunga (2,800m / 9,186ft) and arrive at the Laguna Quilotoa (3,914m / 12,841ft) — enjoying the highlight of the trip at the start of the trek. But, unless you’ve already spent time at this altitude, I don’t advise you to do this as you might have issues acclimating to the elevation.
Gradually reaching higher altitudes is always best in my opinion.
Hiking the Quilotoa Loop Counterclockwise
If you opt to hike counterclockwise you’ll get to enjoy the Quilotoa Lake at the end as your reward for the hard trek. We came across more travellers who were hiking counterclockwise, rather than clockwise. This route also allows you to gain altitude more gradually, meaning you’re less likely to suffer from any altitude sickness symptoms.
We chose to do the trek counterclockwise. If you take this route, it would likely look like this:
Latacunga ⇢ Sigchos ⇢ Isinliví ⇢ Chugchilán ⇢ Quilotoa ⇢ Latacunga
We were in Otavalo prior to the Loop, so we took a bus from Otavalo to Latacunga and spent one night there. We knew we wanted to spend 3 nights on the loop, and that we wanted to make it to the Thursday market in Saquisilí. So when choosing our route, we had those things in mind.
Due to time constraints, we bypassed Sigchos altogether, and headed straight for Isinliví. But in hindsight – after seeing how wonderful this trek is – we would’ve added it onto our itinerary.
Our Quilotoa Loop Recommended Route is:
Latacunga ⇢ Sigchos (by morning bus, explore Sigchos briefly, then hike to Isinliví)
Sigchos ⇢ Isinliví (by foot, 4 hours, spend the night in Isinliví)
Isinliví ⇢ Chugchilán (by foot, spend the night in Chugchilán)
Chugchilán ⇢ Quilotoa (by foot, explore Quilotoa lake and town and spend the night in Quilotoa)
Quilotoa ⇢ Latacunga (see the volcano crater again in the morning, leave by taxi, spend the night in Latacunga)
Latacunga ⇢ Saquisilí (day trip to Saquisilí market, return to Latacunga and leave by bus)
Tips For Hiking to Laguna de Quilotoa
Here are a few tidbits to help you during your Quilotoa Loop hike:
Download Maps.me
This app is a lifesaver on the hike. We had Maps.me coupled with a paper map that we received from Llullu Llama and with that combination, we only got lost for 30 minutes. Having now completed the trek and used a combination of both, I would suggest sticking with Maps.me. I think we ended up hiking longer than needed by having a combo!
But, if something happened to the app while you were hiking, having a paper map would be a great backup. Maps.me works offline, but since you’ll have a hard time connecting to wifi or data in the villages, make sure you download the map before you set off. Everyone we came across on the trail had Maps.me, it’s a must.
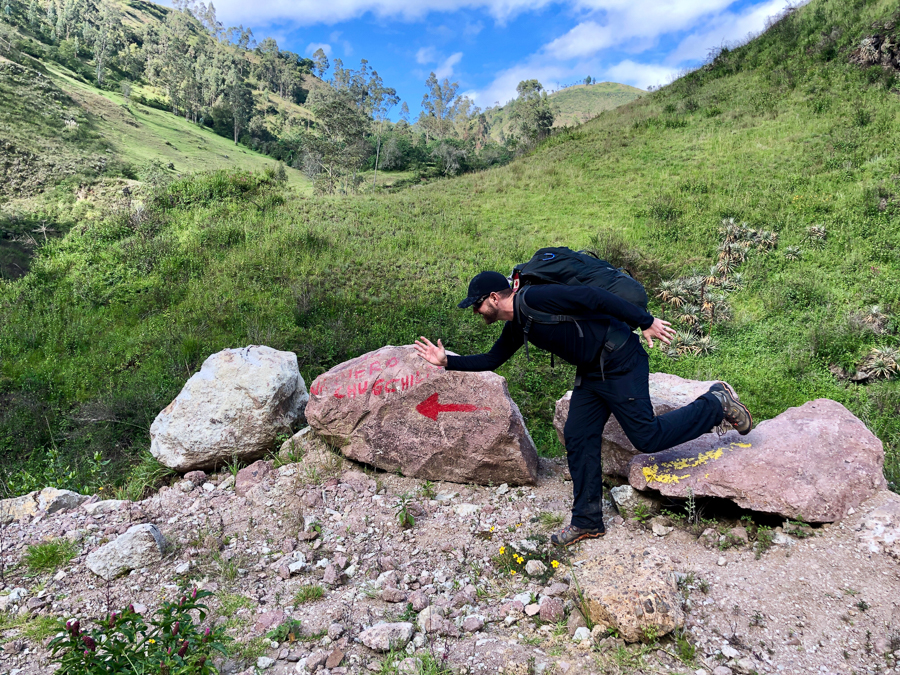
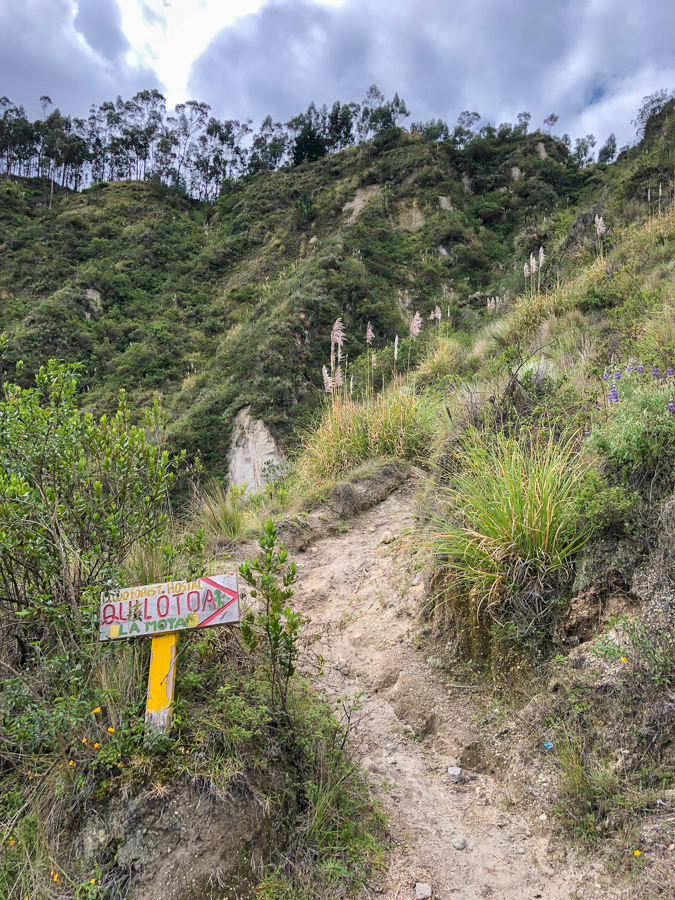
While you’re hiking, keep your eyes peeled for yellow and red signage along the trail, and dots painted on rocks to know you’re going the right way.
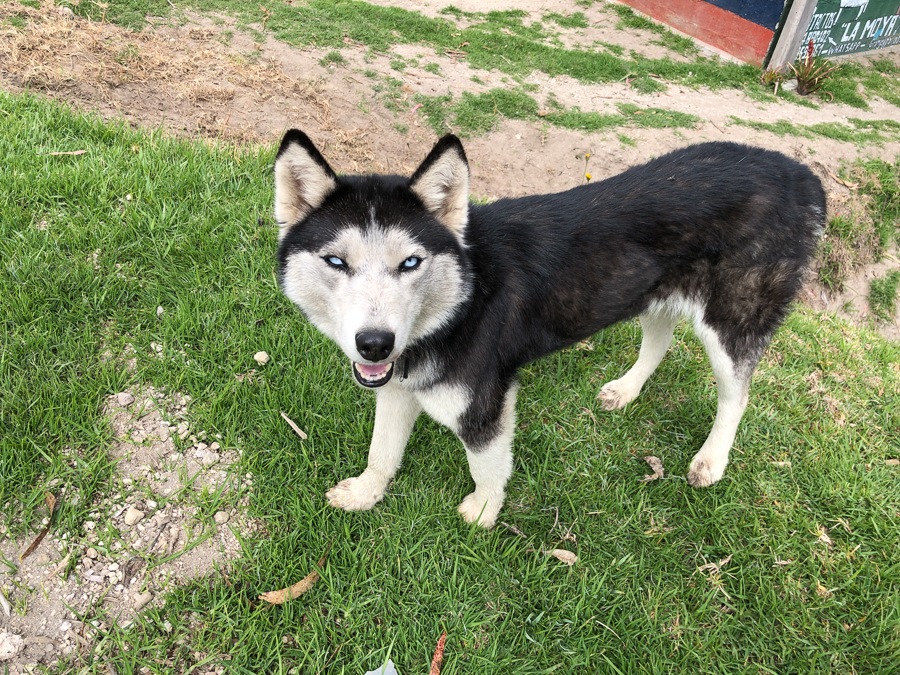
Be Aware of Dogs
There are quite a few dogs along the hike. Some of them are owned and are protecting their property that you’re passing by, and some of them are strays.
We didn’t have any issues with the dogs, but some hikers have. Don’t run away from them and if they are coming closer to you, pretend to pick up a rock (or actually pick up one), as this motion tends to scare them off.
Of course, if they are becoming aggressive and are going to attack you, throw the rock! But if not, just fake them out.
Purchase Travel Insurance
The largest city is Latacunga and even that is a few hours away. You don’t want to find yourself stranded on the side of a mountain with no way to reach medical services quickly.
Purchase travel insurance and protect yourself against anything that could happen while hiking. There are numerous options, but World Nomads is a good bet for adventurous travellers. To read our comparison article of the top 4 travel insurance companies, click here.
Don’t Give Handouts to Children
This is a hard one. During the loop hike, you’ll pass by small villages and homes set in stunning farmland. With that, you’ll also find sweet children asking for handouts — either money or candy.
Do not give in. All that does is encourages the parents to send their children out to ask for things from foreigners…when they could be in school instead, or simply enjoying being a child.
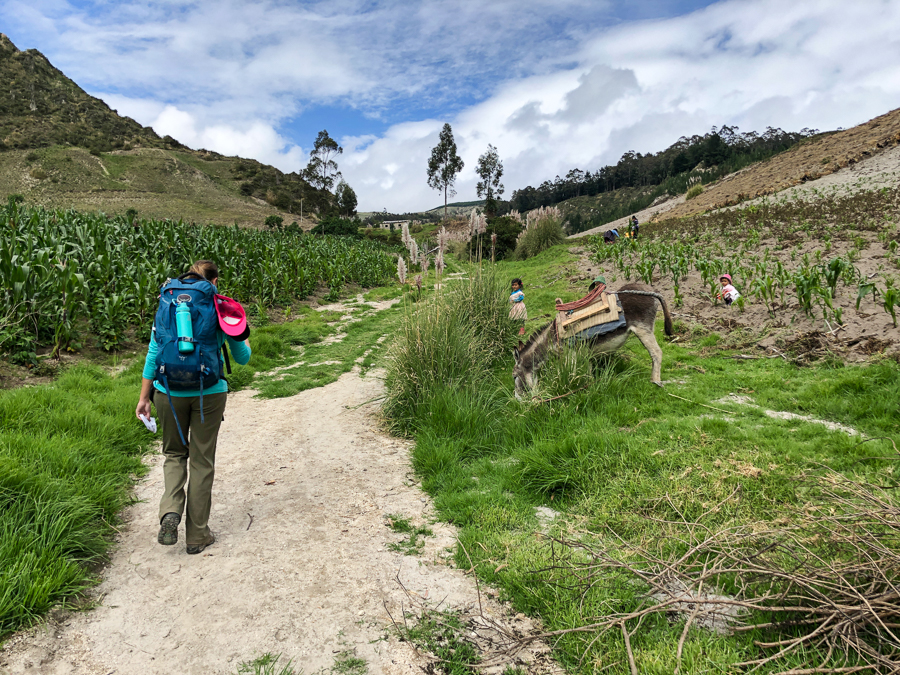
There are better ways to support the communities, in the form of purchasing goods made by locals and taking some tours in each village as well. Which brings me to my next point…
Bring Some Cash
There are no ATMs and nowhere accepts credit cards. Make sure you have enough cash for your Quilotoa Loop trek, including your accommodation, any extras at your hostel (booze and lunch packs), local tours to nearby places, snacks from the small shops and any artisan products — for example, there is a man selling paintings along the loop.
Leave Early’ish In The Morning
In February, it seemed as though the clouds constantly rolled in during the afternoon. We’d have beautiful, sunny mornings and then by about noon, the weather turned. I recommend starting your day fairly early (unless it looks socked in) so that you can enjoy a dry day of hiking.
Be Properly Acclimated
If you’re arriving in Ecuador from sea level, it’s best to take some time to properly acclimate before attempting to hike the loop. Quito is located at 2,850 metres (9,350 ft) and is a good place to spend a few days getting used to the elevation.
Laguna de Quilotoa sits at 3,914 m (12,841 ft). This is why I recommend hiking counterclockwise — travel from Quito to Latacunga (9,055 ft / 2,760 m) and gradually make your way up to 3,900+m.
What To Pack For The Quilotoa Loop
This is another major reason why we wanted to start and finish our Quilotoa Loop trek in Latacunga. There are no porters for this hike so you’ll be carrying everything that you need. The less stuff you’re carrying when hiking up the side of a volcano, the better!
We left our luggage in a locked storage room at the hostel we stayed at in Latacunga (Hotel Rosim). The family-owned place was nothing to write home about, but it was clean enough, a nice breakfast was included and the family were very friendly and seemed quite trustworthy.
The Lonely Planet recommends leaving your backpacks at Hostal Tiana when heading out on the loop, so that may be a good option as well.
All you will want to bring with you is your passport, clothing, a small first-aid kit, and toiletries. We even left our electronics behind as they are way too heavy (luckily, they were still there when we returned), but use your own discretion when deciding whether or not to leave your valuables behind.
The weather can turn regardless of which time of year you are trekking in this area. Be prepared for all seasons. We hiked in February and had a complete mix of spring, summer, and fall during our trip! Keep in mind that the hostels on the loop might not be properly insulated and the wind can be biting.
Here’s what I recommend packing for the Quilotoa Loop:
Clothing and Footwear
- Good pair of hiking shoes
- Pair of shoes to wear at the end of each day (sandals or a closed-in shoe)
- Socks for the duration of your trek (plus a bonus pair)
- Thick socks for sleeping
- Hiking Pants (I always hike in Halle Pants by Prana and Nick wears trekking pants by Columbia)
- T-shirts for warm hiking days
- Long-sleeved shirt for cooler hiking days (or to prevent sunburn)
- Base layer for cool nights
- Fleece jacket for cool nights
- Raincoat (windproof and waterproof) for rainy days on the trail
- Rain pants (windproof and waterproof)
- Down jacket (they don’t take up much space, and can provide a lot of warmth if needed)
- Toque (beanie) for cold nights
- Ball cap for sunny days (the sun can be intense at this altitude)
- Bathing suit
- Sleepwear
Equipment
If you’re staying in the lodges and hostels along the way, you won’t need to bring your own tent. However, if you want to camp, most of the guesthouses offer this option. You won’t need a sleeping bag if you’re staying in the guesthouses, but you might want one.
- Tent and sleeping bag (optional)
- Trekking poles (some people like them when hiking, others don’t)
- A sturdy, comfortable backpack (we used this pack for the hike, but since then have purchased this one)
- Backpack cover for when it rains
- Reusable water bottles
- Steri-Pen
- Pocket knife (never know when you’ll need one)
- Headlamp (optional, but might come in handy)
- Phone with GPS
- First-Aid kit (including antihistamine, anti-diarrhea, ibuprofen, Band-Aids/plasters for blisters, tweezers, a lighter, and a broad spectrum antibiotic)
Toiletries
- Toothbrush
- Small tube of toothpaste
- Deodorant
- Small sunscreen
- Small shampoo and soap — hot water was in and out where we stayed, it may be too cold to wash your hair ladies!
- Baby wipes / wet naps — when there isn’t any hot water and you need to clean off
- Any other necessary items
Other
- A book
- Deck of cards or another light-weight game
- Charger for your phone
- External charger in case your phone dies
- Camera
What Is The Accommodation Like On The Quilotoa Loop?
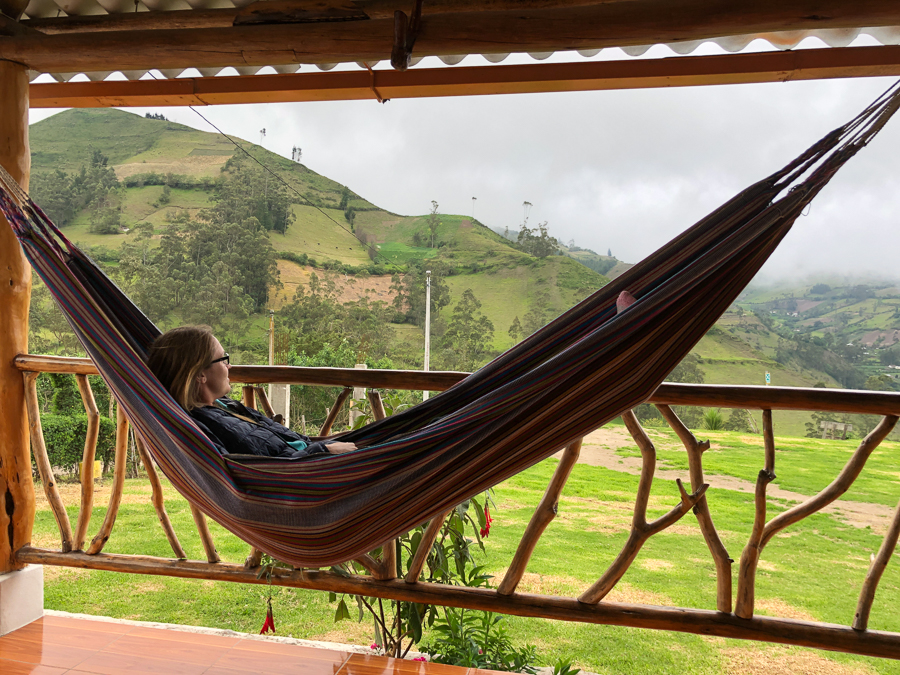
Luckily, there are some great options for travellers along this hiking route. Expect character-filled guesthouses with epic views across farmland and hills and comfortable beds.
All of the accommodations that we encountered (and stayed in), had breakfast and dinner included in the room rate. Portion sizes were large and the food was very tasty. Tables are shared, which is great as you can meet fellow trekkers and have a meal together.
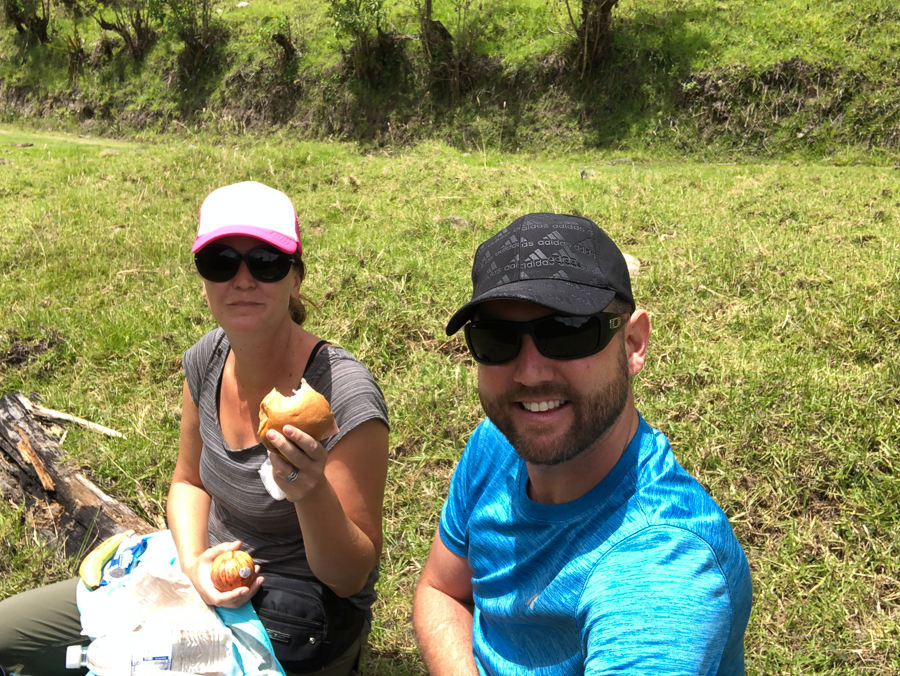
Lunch boxes are available for purchase ($3-$5) and typically include a basic sandwich, a piece of fruit, cookies/something sweet and a drink. Enjoy a picnic along the trail the next day.
Sigchos: You might not find yourself staying in this village, but in the chance that you do, you could consider Hosteria San Jose or Hostal Dinos.
Isinliví: There are two great properties available for hikers — Llullu Llama and Hostal Taita Cristobal (the cheaper option, and is where we stayed). Note, it says that Taita Cristobal is in “Chugchilán” on Booking.com, but it’s in Isinliví. You’ll want to reserve either of these properties in advance, however, as they are likely to book out. Even if you don’t stay at Llullu Llama, I recommend going there to get some information about the trek from the helpful staff and make sure to ask for one of their maps.
For one night in a private room with private bathroom, including breakfast and dinner at Hostal Taita Cristobal, we paid $34 for two people.

Chugchilán: There are a few excellent places to stay here. In town, is the popular Hostal Cloud Forest (which also has numerous advertising signs along the loop), Black Sheep Inn, which is a more expensive option, and El Vaquero which is where we stayed (and is right where the trail to Quilotoa Lake is).
For one night in a private room with a private bathroom including breakfast and dinner at El Vaquero, we paid $40 for two people.
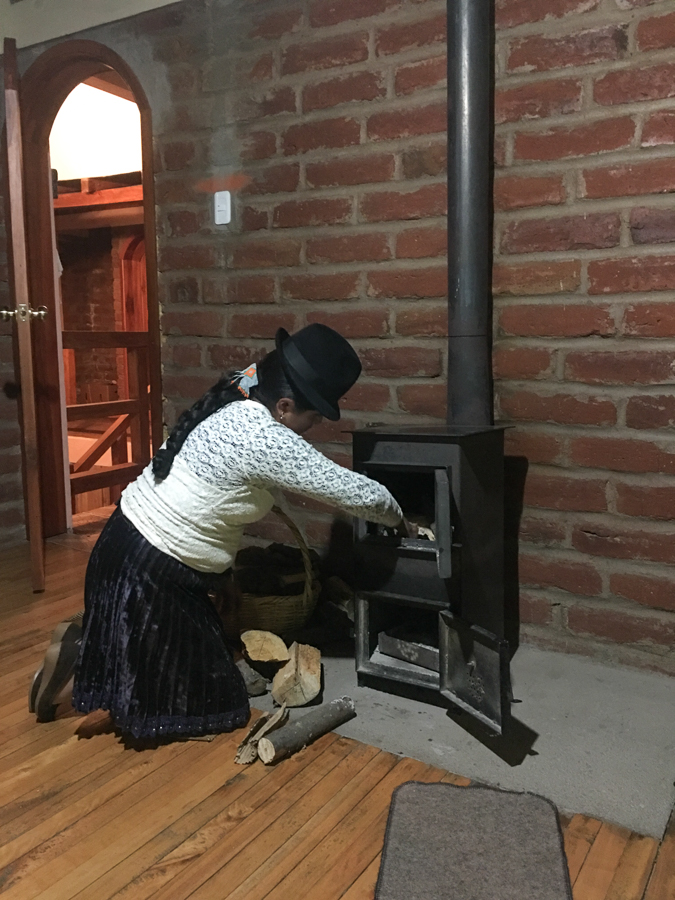
Quilotoa: There are lots of accommodation options here at the lake, but many of them are extremely basic and have poor reviews. We stayed at Runa Wasi and highly recommend it. The rooms are cozy and have their own fireplace! A staff member will come and light it for you when you ask. A hearty dinner and breakfast are included as well.
For one night in a private room with a private bathroom including breakfast and dinner at Runa Wasi, we paid $28 for two people.
Latacunga: The starting and ending point for many people hiking this Central Highlands loop. Latacunga is an OK city (better than we thought it would be), but there’s still not much here. It’s typically used as a base for the Quilotoa Loop and to visit the Cotopaxi Volcano. We stayed at Hotel Rosim, but Hostal Tiana is recommended, as is Hostel Sendero de Volcanes and Hotel Endamo.
For one night in a private room with private bathroom including breakfast at Hotel Rosim, we paid $30 for two people.
Our Recommended Quilotoa Loop Itinerary
On other blogs, you’ll find that they have written out extremely detailed notes about how to trek the Quilotoa Loop, but now that Maps.me is so accurate, there’s really no point in me writing exact directions here. Instead, enter your departure point and arrival point in Maps.me and simply follow the GPS offline to get there.
In the following itinerary, I’ll list a few of the highlights so that you know how to tackle the route, and what to expect along the way.
Quilotoa Loop: Day #1 – Latacunga to Isinliví by Bus
- Duration: 2.5 – 3 hours by bus (leaves from the Latacunga Bus Terminal)
- Bus Ticket: $2.50
When hiking the loop counterclockwise, many people opt to bus from Latacunga to Sigchos and then hike from there to Isinliví. Since we didn’t have enough time, we bused straight from Latacunga to Isinliví, skipping Sigchos altogether.
Buses depart for Isinliví from the Latacunga bus station at 1:00pm only. They leave at 11:00am on Saturdays. It takes about 2.5 – 3 hours to get to Isinliví (depending on road conditions), costs $2.50 per person, and the drive through rolling hills is beautiful.
If you prefer to bus to Sigchios from Latacunga, there are 4 – 6 buses per day, and it takes around 2 hours to get there. Or, you can hire a private truck for about $5. We didn’t do this, but would recommend it as many of the other hikers enjoyed this portion of the trek and, if you bus to Sigchos early, you can add this portion to our loop without adding any extra days on your itinerary.
Arriving in Isinliví was a surreal moment. It was silent. Not in an eerie way, but in a “wow, this place is magic” sort of way. Apart from ourselves and one other backpacker, a handful of locals disembarked from the bus and were greeted by their loving families, and a couple of excited dogs as well.
We only walked for about 5 minutes to reach Hostal Taita Cristobal, and our first impressions were great. Fantastic views across the hills, a lovely garden area (with llamas!), and some hikers coming and going — we couldn’t wait to hit the trail the next day.
There are a couple of things to do here in Isinliví, so if you have the time, you could actually spend 2 nights. Apart from simply wandering around the quiet village and relaxing in a hammock, you can visit the pre-Incan hill fortress and viewpoint, go horseback riding, or check out the village church.
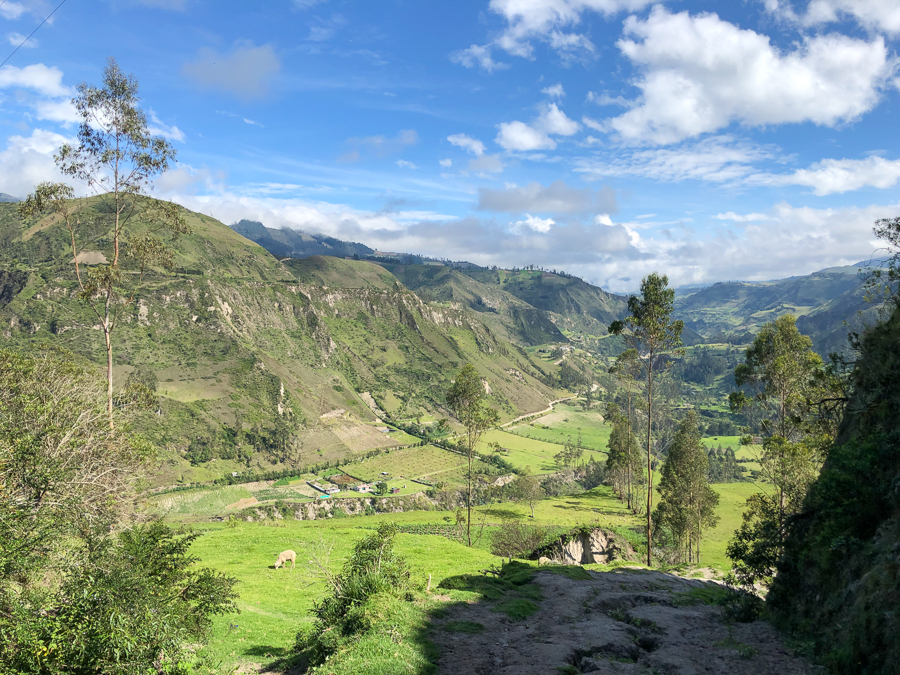
Quilotoa Loop Day #2: Isinliví to Chugchilán by Foot
- Walking Time: 4 – 6 hours (we took 5.5 hours with photos and lunch break)
- Distance: 11 kilometers (6.8 miles)
- Tips: Leave early in the day, clouds roll in during the afternoon
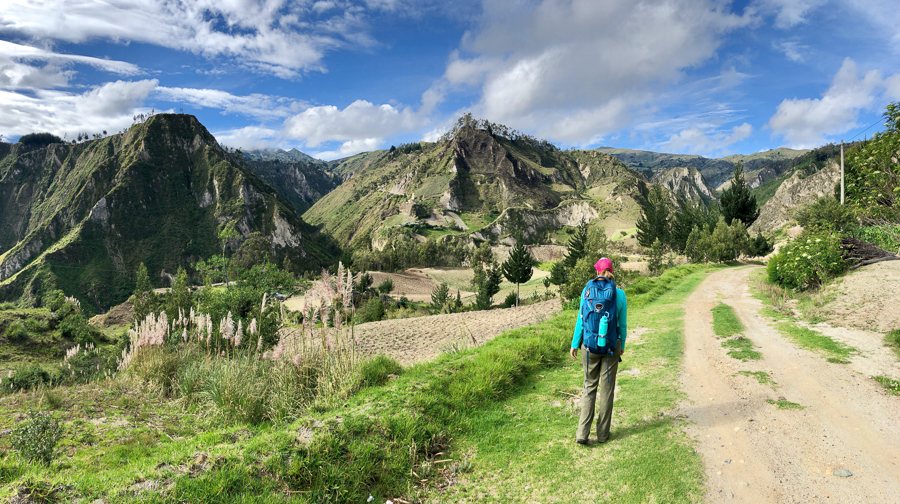
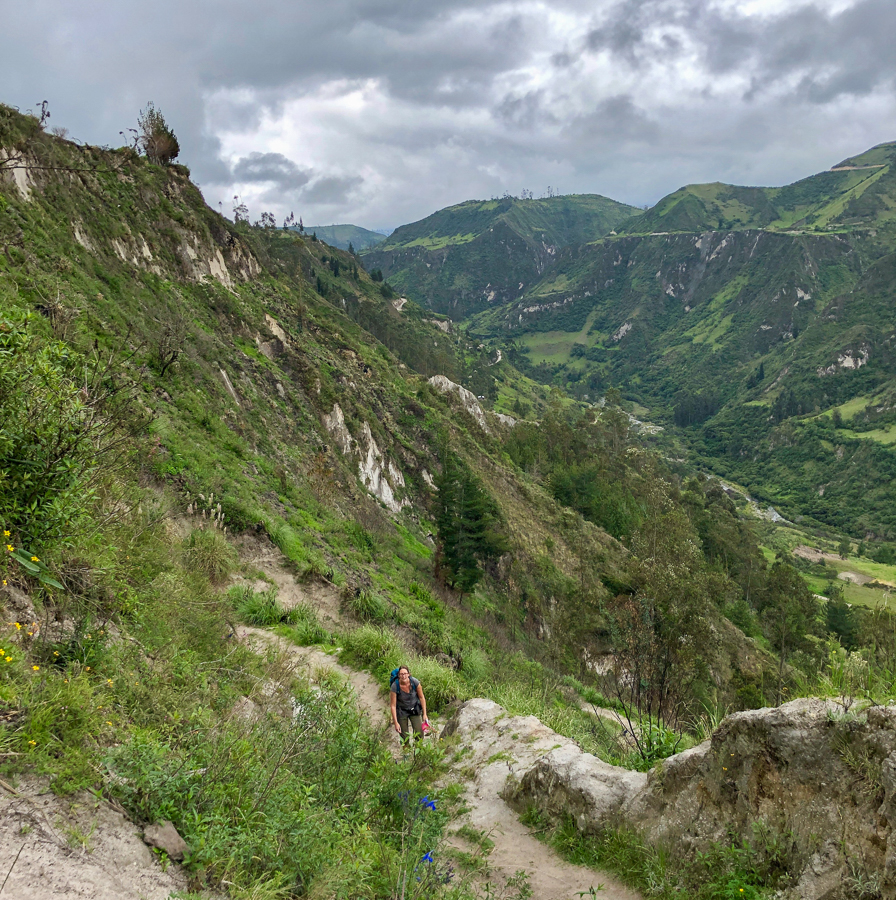
- Scenery: Rocky terrain, expansive views, river crossing, steep incline, viewpoint
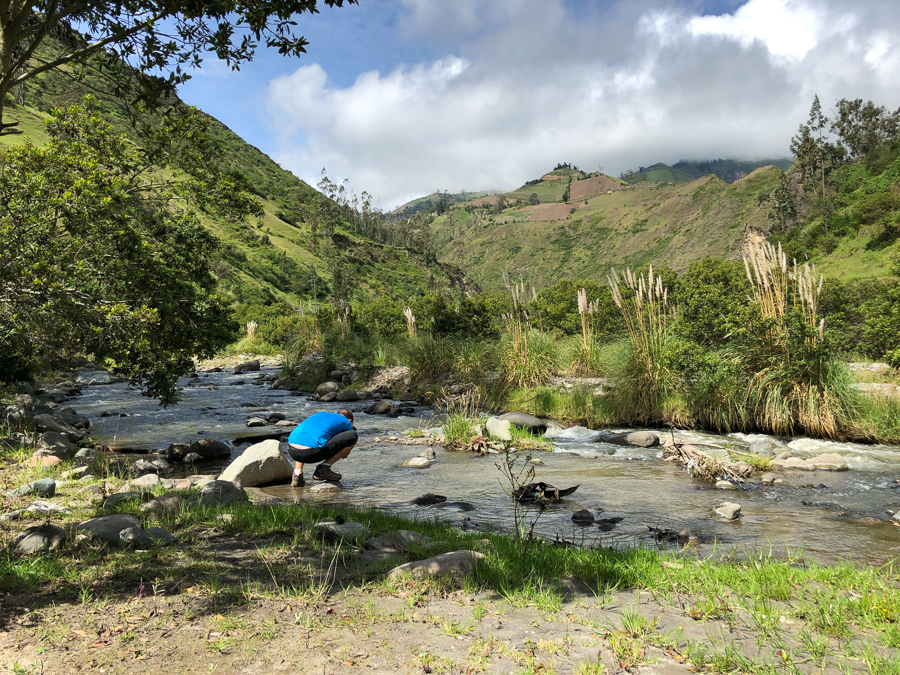
After breakfast, pack up your bags, pick up your lunch box and hit the trail — with a paper map and Maps.me in hand. Immediately, you’ll be greeted with rolling hills and farmland in front, before walking along a rocky road. Eventually, you’ll descend down towards the river, which is a great place to cool off and take a breather.
After passing through an open field, you’ll walk across a log bridge over the river. Enjoy the flat bits as much as you can, as after not long you’ll be ascending. Up, up, up to the top of the canyon for an amazing view across the valley below — I struggled with this part and it seemed to take me forever to reach the top.
Once you’re at the viewpoint, you’ll find a man selling his paintings, and children asking for money — purchase the painting and don’t hand out money to children.
Continue on for a bit before checking into your accommodation, grabbing some tea to warm up and enjoying the evening chatting and having a meal with your fellow trekkers.
Chugchilán actually has quite a few things to do. If you have time and want to spend an extra night, you can visit a cheese making factory, go horseback riding, hike about an hour to Mirador Pugara, go to the Country Bar, and simply wander around town interacting with the locals (around 6000 people live in Chugchilán).
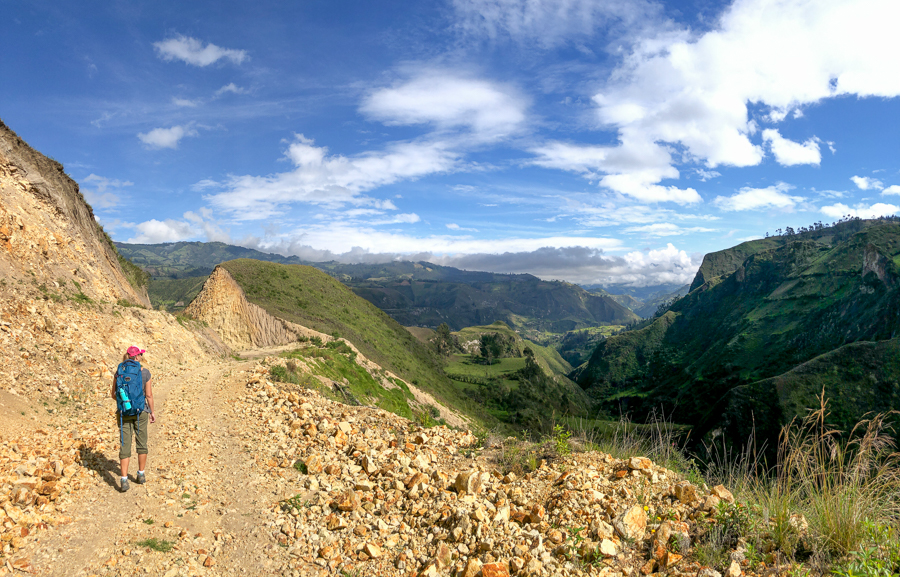
Quilotoa Loop Day #3: Chugchilán to Quilotoa by Foot
- Walking Time: 4 – 6 hours (we took 6.5 hours this day, with 30 minutes of backtracking due to a wrong turn)
- Distance: 12 kilometers (7.5 miles)
- Tips: Leave early in the morning – clouds roll in during the afternoon
- Scenery: Mountain scenery, steep ascent, Village of Moya, canyon skirting, waterfalls, small villages, Quilotoa lake lookout points, hiking the volcano rim to reach Quilotoa town
This day felt like a long one to us, with trekkers passing us on the trail! The day starts out beautifully with gorgeous scenery and somewhat flat terrain, but then you see the mountain in the distance that you have to climb. Pass through some farmland with locals tending to their crops, and head towards the sandy looking mountainside.
We almost made the mistake of following some hikers ahead of us who were attempting to climb a sheer, vertical, shale wall — many of them were slipping backwards, it was hard to watch. We ended up seeing a sign that had us veering to the right to reach the summit in a more roundabout, safer way.
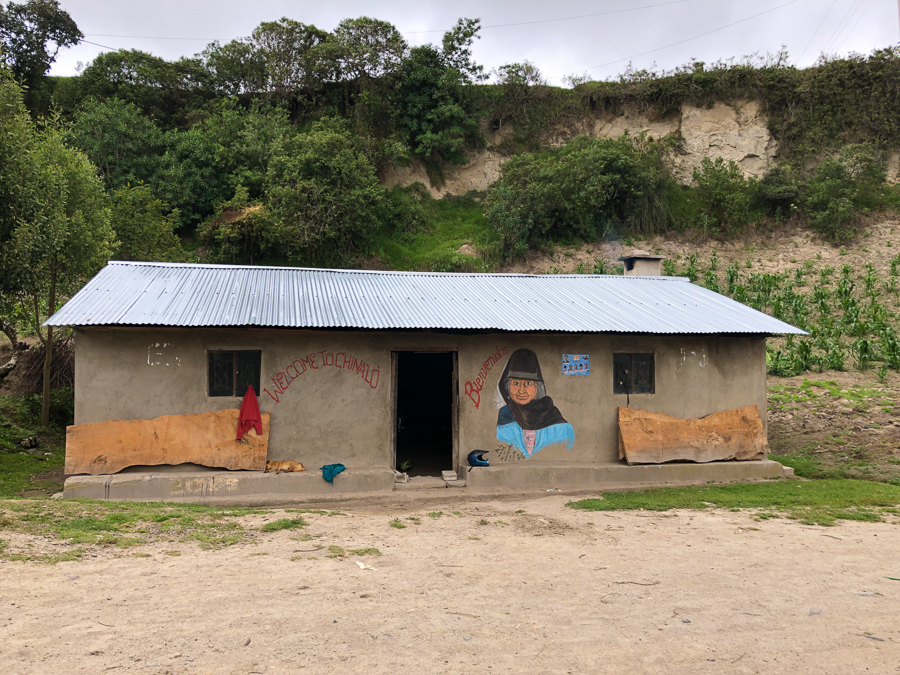
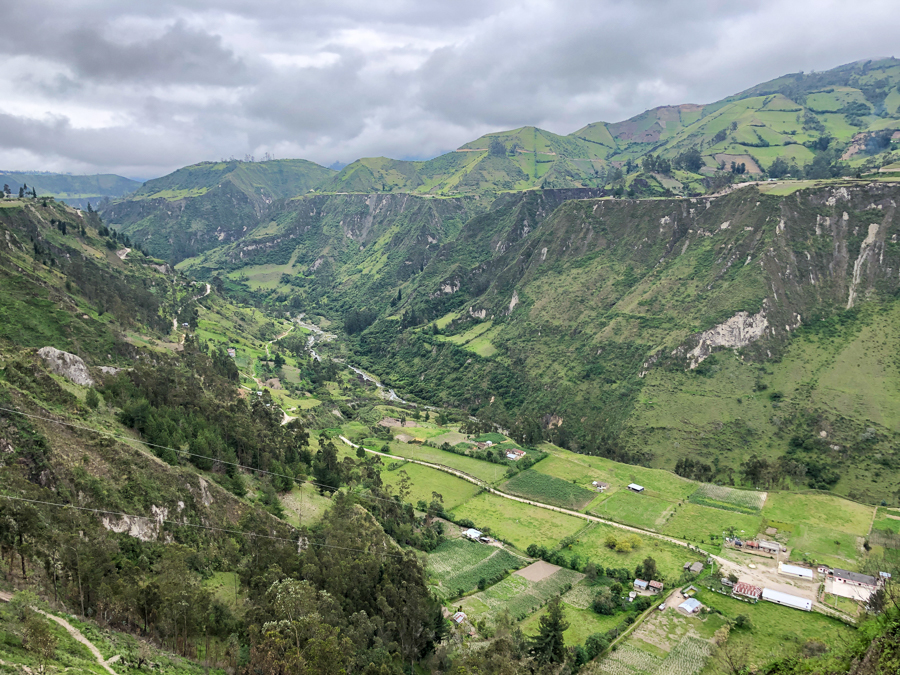
Eventually, you’ll reach La Moya village, followed by a huge canyon. Don’t descend into the canyon, but rather skirt around the edge, following the trail and red dots, before reaching a small river to jump across.
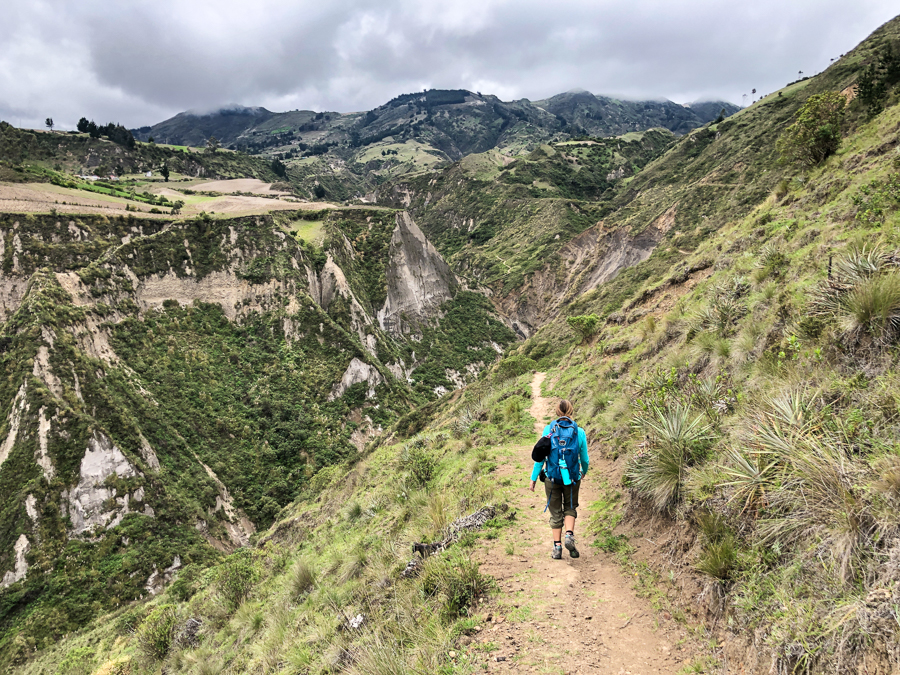
You’ll pass by another small village and some homes before arriving at a lookout point over the valley where you just hiked from. Continuing to hike up, you’ll arrive at the crater rim — and if you’re lucky, you’ll have sweeping views across the Quilotoa Lake.
We weren’t so lucky and the crater was completely socked in. It was raining, cloudy and the wind was biting. It’s about another 3 kilometers hiking along the rim (follow the dots and signs) before you arrive at Quilotoa Town. Portions of this hike are a bit precarious, so watch your footing — especially if you have bad weather.
There’s a little shop at the lookout point selling drinks.
Check into your accommodation, explore Quilotoa town and enjoy a meal with your fellow trekkers.
You made it!
Quilotoa Loop Day #4 – Quilotoa to Latacunga by Bus / Taxi
- Duration: 2.5 hours
- Bus Ticket: $2.50
- Taxi Price: $6
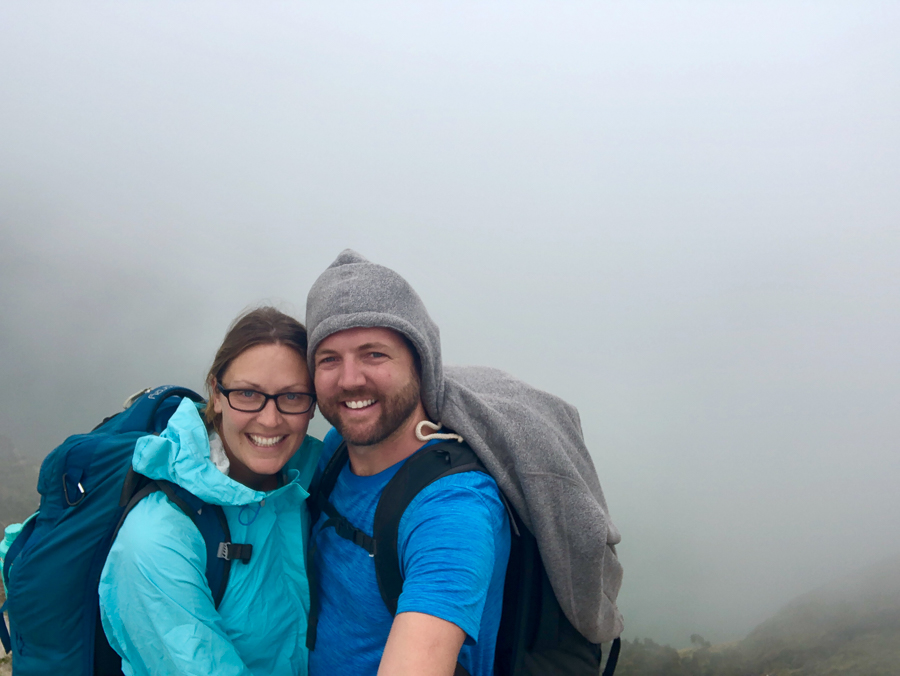
If you have horrible weather when you reach the crater rim (as we did), I suggest waking up and heading back to the crater this morning. Wait around as well as the weather can change in an instant. We packed up our bags, enjoyed a hot breakfast and waited a little bit.
As luck would have it, the weather cleared and we were given epic views across the Laguna de Quilotoa!
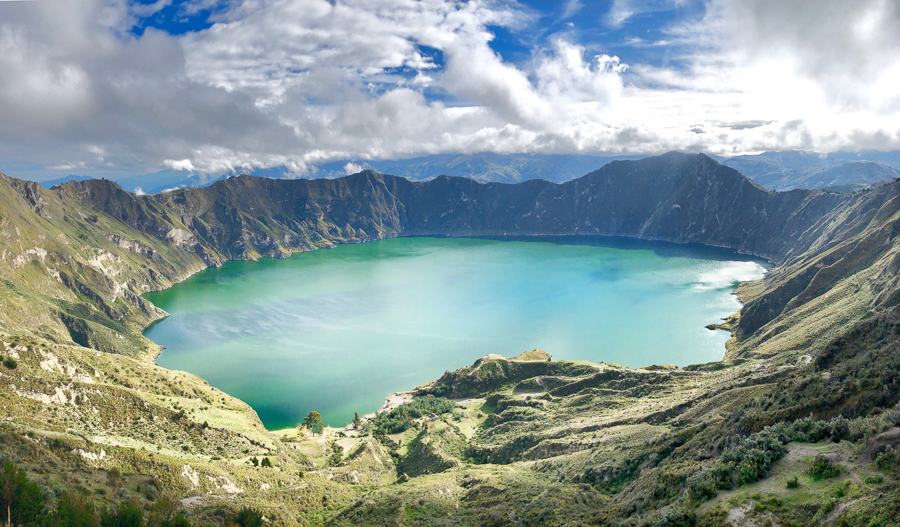
Finally, we were able to see the amazing view that we should’ve seen the day before. If you have time, you can hike down to the lake, rent kayaks, walk the entire circumference of the volcano crater rim, or simply enjoy a meal at one of the many restaurants.
After that, head back to Latacunga. Buses are frequent, every hour or so, but make sure to ask you accommodation for the current bus timetable.
After waiting for a bus to come, a taxi came by and we asked how much it would cost to Latacunga. He said $6 and we jumped on that price.
Quilotoa Loop – Latacunga to Saquisilí by Bus / Taxi
- Duration: 25-30 minutes
- Bus Ticket: $0.30
- Taxi Cost: $5
Saquisilí isn’t a village that you would hike to on the loop, but it is a village that is in the area and I highly recommend you visit. On Thursdays, there’s a market which is probably the most authentic one we’ve seen anywhere in the world.
Apart from 2 other tourists, we were the only foreigners there. Hundreds of Ecuadorians from Saquisilí and the surrounding villages descended on the various plazas, streets, and parking lots that were transformed into vibrant markets.
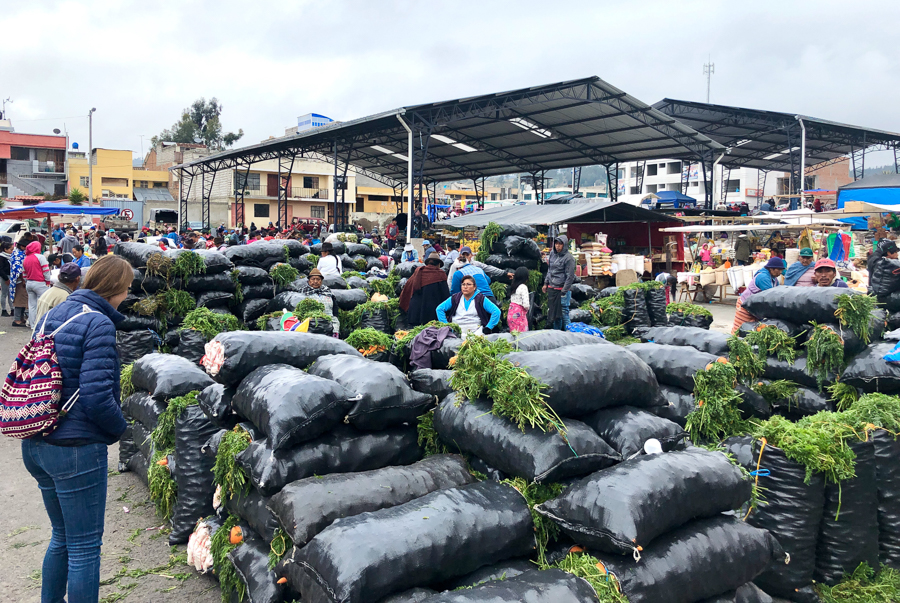
One area was all about fish and seafood, another was filled guinea pigs and chickens, one was full of housewares, a huge plaza was full of produce brought straight from the farm, and there was a live animal market as well.
The animal market was something we really wanted to experience, but once we did, we were saddened by how the animals were treated — many of them were ill from the truck journey to the market, pigs were squealing, and basically, animals were just thrown into vehicles once purchased.
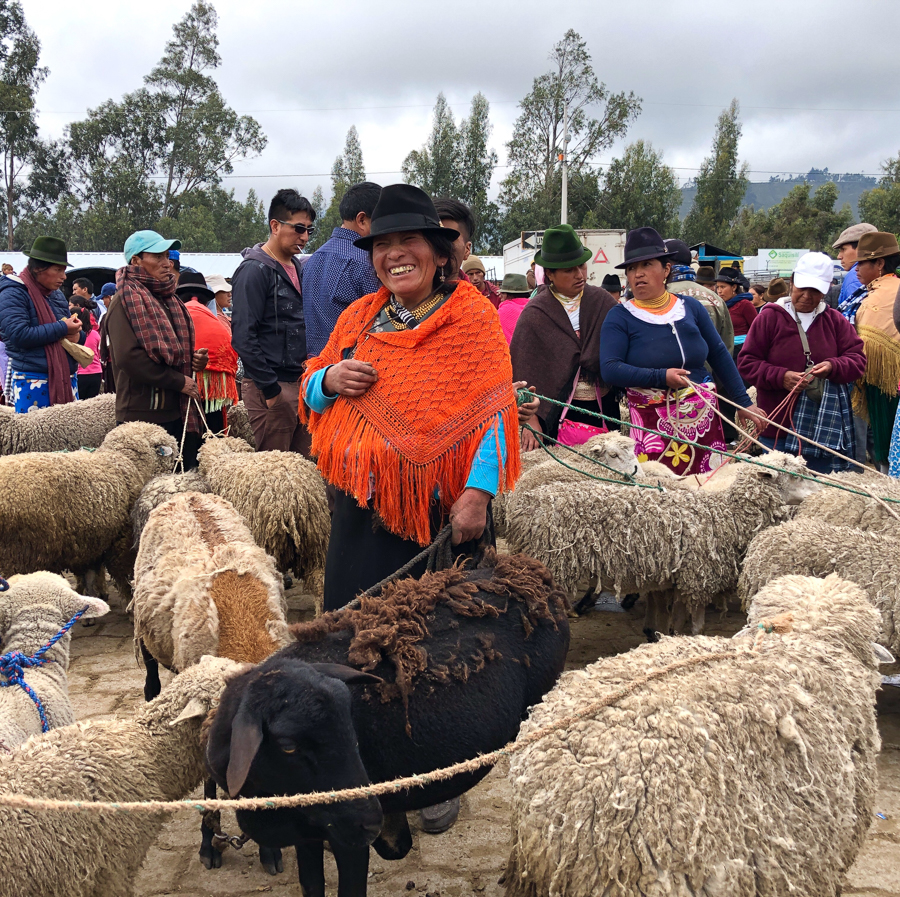
However, this is part of daily life here in the Central Highlands of Ecuador. Markets like these are how people earn an income, and farming and animal rearing are a huge part of it. If it doesn’t sound like something you want to see, you don’t need to visit that part of the market, as there are plenty of other things to enjoy.
The market starts early, and I suggest getting there around 8:00am, or earlier.
If the timing works out, you can also take a bus to the Saquisilí market from Chugchilán and Sigchos.
Enjoy The Adventure!
Hopefully this guide to trekking the Quilotoa Loop helped alleviate any questions you might have had. Or, maybe it inspired you to put it on your Ecuador travel list! If you have the time, I recommend spending a week in this area — it’s peaceful, natural and is home to welcoming indigenous people. Happy trekking!
Check out our video from our Ecuador and Peru travels (including the Quilotoa Loop!)
Like This Article? Pin it!