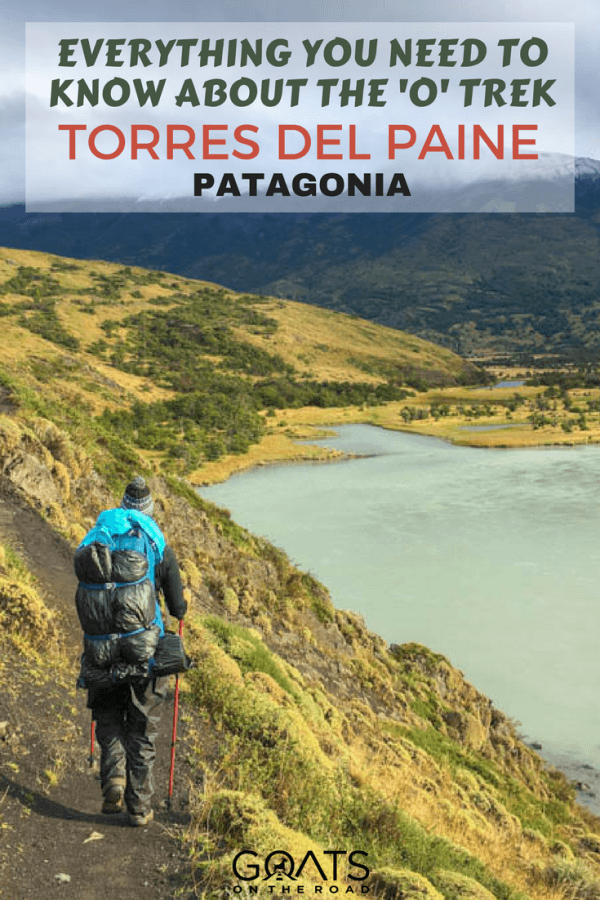
The Circuit trek in Torres del Paine is a trip for the intrepid traveller! This is an expedition where you’ll truly be out in nature, and away from the crowds. When deciding which trek to do in the National Park (W or O), it’s important to be realistic about your physical abilities.
The “O” (Circuit) trek is for those with an adventurous spirit, who are wanting to hike for a longer period of time, and who are in fairly good shape.
In this guide to trekking Torres del Paine, Chile, we’ll give you priceless insider advice and tips from our recent experience in March, 2017.
First Things First
As of October, 2016, you MUST have reservations for all of the camps that you intend to stay at. Whether it’s the free camping sites, paid campgrounds or the refugios, you must have a printed out reservation (or proof of it on your smartphone) to show to the rangers at the camps.
There are 3 companies for camping Torres del Paine on both the Circuit & W trails:
Vertice Patagonia – Campsites: Dickson, Los Perros, Grey and Paine Grande
Fantasticosur – Campsites: Serón, Los Cuernos, El Chileano, Central and Frances
CONAF – Free Campsites: Italiano, Paso and Torres Ranger Station & Camping
Click on the respective links to book your campsites.
Before setting off to Torres del Paine, you’ll most likely be spending a night or two in the town of Puerto Natalas. There are numerous guesthouses, hostels and hotels there.
☞ Click here to compare prices & see reviews on accommodation in Puerto Natalas on Booking.com
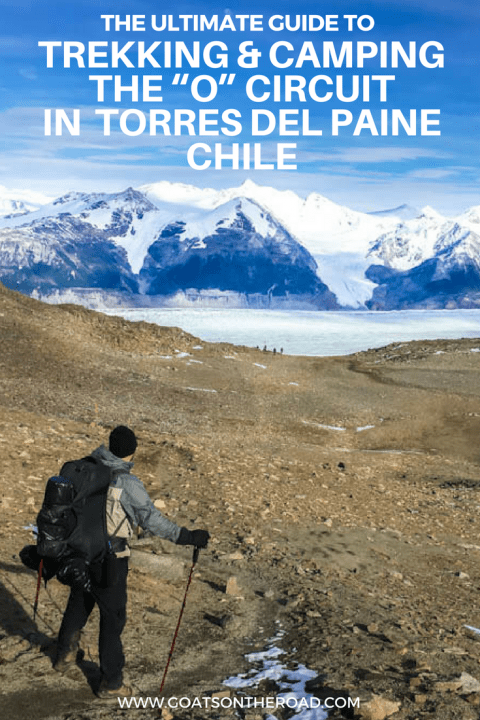
What is the “O” Circuit?
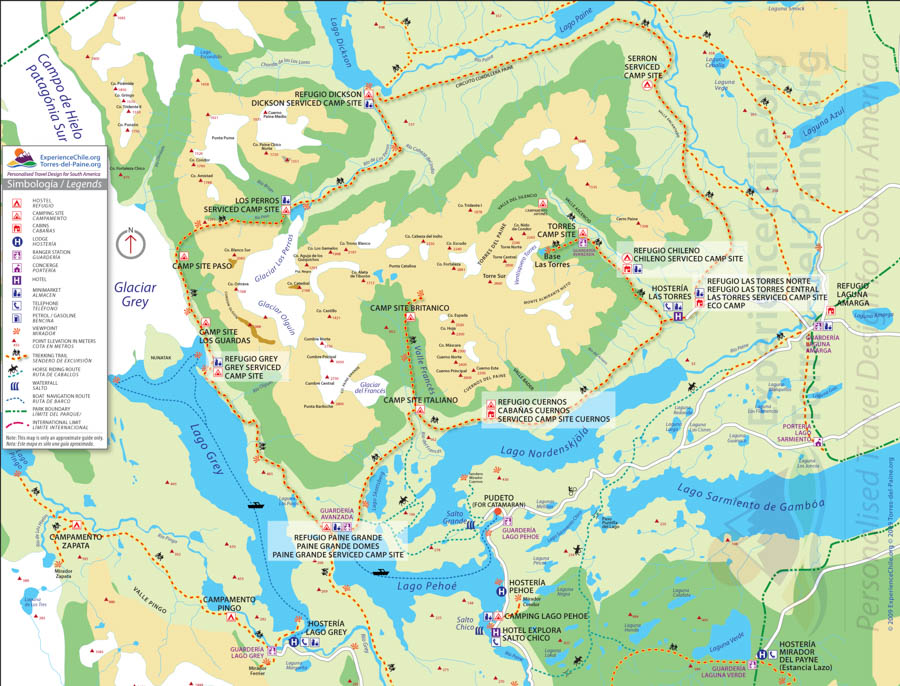
As the name suggests, it’s a circuit. The “O” includes the “W” trail, with the addition of the backside of the mountain to make it a long loop – 130 kilometers.
Most people opt to do the circuit in 7 nights, 8 days. However, you could do it over a longer period of time if you prefer to have shorter trekking days and to stay in more camps along the way.
This trek starts at the Las Torres Hotel and ends at the same place. From Las Torres Hotel, the first camp heading counterclockwise is Serón. From Serón all the way along the backside of the mountain to the Paso Ranger Station and Camp, you can only trek counterclockwise.
The backside of the mountain is a portion of the O Circuit, not the W.
From Grey Camping to Las Torres Hotel (on the front side of the mountain), you will be connected up with the “W” part of the trek. People can trek counterclockwise, or clockwise on this portion of the trail.
Only a maximum of 80 people are allowed on the backside of the mountain each day, while the W doesn’t have a limit.
Needless to say, when you connect up with the W portion of the Circuit trek, it will be much busier than the backside of the mountain.
What Are The Camps Like When Trekking Torres del Paine?
What your camps will be like depends on which ones you decide to stay at. The free campsites are more basic than the paid camps, but are often more sought after. Here is a breakdown of the camps that we stayed at, and what you can expect when camping Torres del Paine:
Serón: The campsite here is in a grassy, fenced-off field. There are proper toilets and hot water showers available. There is a sink for washing dishes, and drinking water from the tap. There’s not a “hut” for cooking in, but rather 2 picnic tables for cooking and eating at. Cost: 8,500 pesos / person ($12.75)
Dickson: Probably the most beautiful camp on the whole trek! The setting is spectacular. Dickson is an open field and you can pitch your tent anywhere you want. Surrounding camp are towering mountains and glaciers. There is a large dome that you can cook in, filled with picnic tables. There are flush toilets here, a sink and a hot water shower. Cost: 5,000 pesos / person ($7.50)
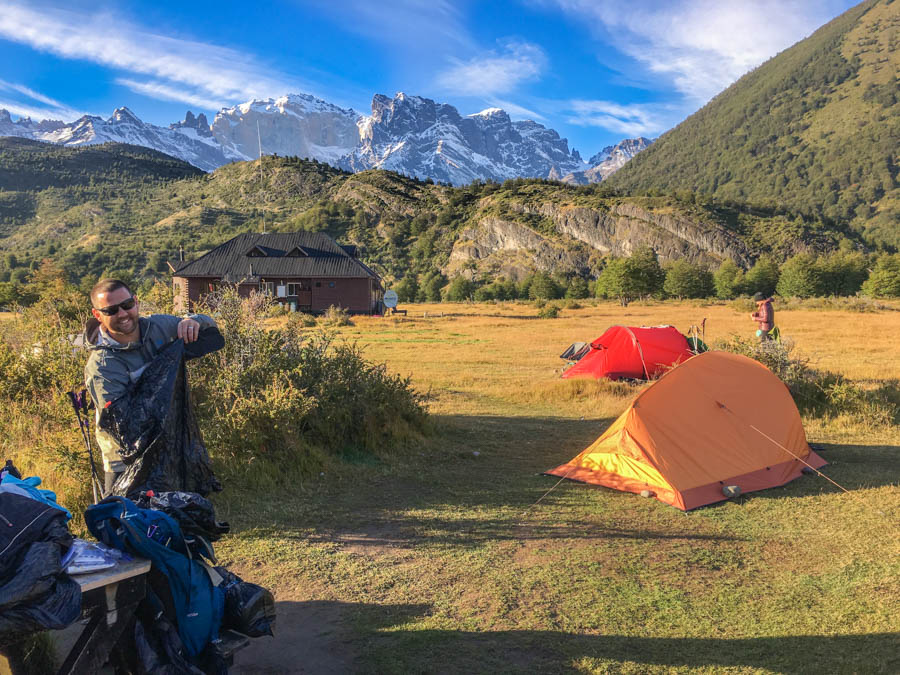
Los Perros: Even though this is a paid camp, it’s more basic than the others. The campsites are dirt plots and although there are flush toilets, there are no hot showers. There is a raised building for cooking in, with some benches and tables. Cost: 5,000 pesos / person ($7.50)
Paso: There is a very basic outhouse, no shower and a small hut for cooking in with a couple of benches alongside the wall for sitting on. The campsites are dirt rather than grass. The ranger we encountered here wasn’t the friendliest guy ever. There was a cheeky fox here snooping around and trying to steal people’s food and shoes, be careful! Cost: Free
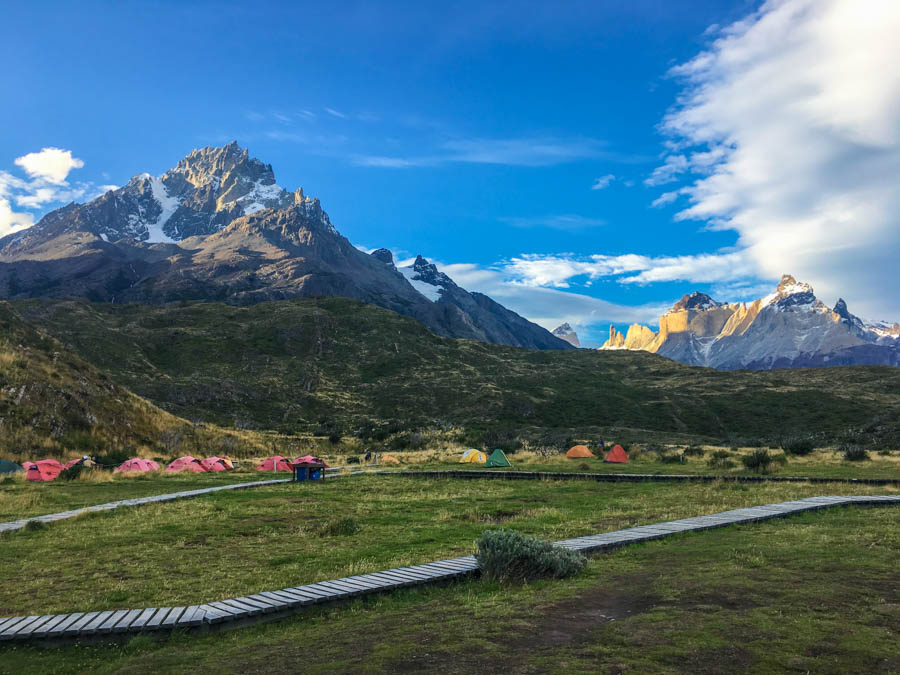
Grey Lodge & Camping: (We didn’t stay here, but stopped in). This is a busy camp with people staying at the refugio and camping in the field as well. There is a great lookout point of Grey Glacier here, making it a popular stop. There are lots of proper bathrooms, showers and a kitchen.
Paine Grande Camping: This is a large campground. You can arrive here by boat, and some people start the W trek from this point. It’s a very busy, but nice campground. There are lots of (lumpy) campsites spread out over a field. You’ll find foxes here, so take care of your belongings. There is a large bathroom and shower area, with hot water. There is also a large enclosed building that is used as the kitchen area. It has many tables inside. There’s a small shop here as well. Cost: 6,000 pesos / person ($9.00)
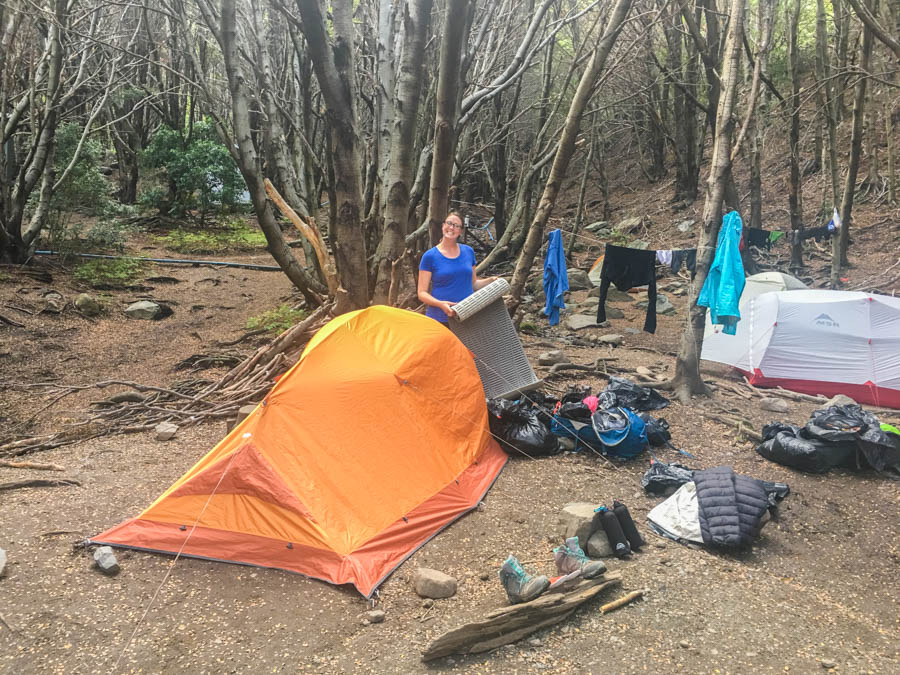
Italiano: This campsite is fairly large as many people stay here (it’s a part of the W trek). There are a few long-drop toilets, but they have an actual seat to sit on. The showers weren’t open when we were there, and even if they were, I’m sure they are cold water. There is a small shack for cooking inside and 1 picnic table, plus 2 other “tables” for sitting at and eating. Campsites are dirt rather than grass. Rangers here are great. Cost: Free
Torres Ranger Station and Camping Zone: There are quite a few nice, flat, dirt campsites available. There is 1 bathroom with a flush toilet and a small shack for cooking. There are no seats here for eating on, just some rocks and logs. The ranger is very friendly. Cost: Free
What to Pack for Trekking Torres del Paine
In this guide, we’re assuming that you are planning to camp and cook along the trail. There are options to stay in refugios which provide you with a bed and board, or you can also rent tents and receive food at many of the camps. The cost of this varies and you’ll have to reserve online.
Here is a list of what to pack for an independent camping trip along the “O” Circuit in Torres del Paine:
Clothing
- 2 t-shirts (one for trekking, one for evenings)
- Thermal base layer top for during the day, or night
- Fleece for evenings
- Down jacket for evenings
- Waterproof / windproof jacket for wet days, or cool nights
- Thermal leggings for during the evening
- Hiking pants (preferably with some pockets)
- Waterproof / windproof pants for rainy days, or windy, cool nights
- Underwear for every day
- Regular socks for every day, with a pair of warmer hiking socks on top (double up)
- Warm socks for evenings
- Toque (beenie)
- Bandana / Buff
- Gloves
- Scarf / neckwarmer
- Sturdy pair of waterproof hiking shoes with ankle support (I have Merrels, Nick has Keens)
- Sunglasses
Gear
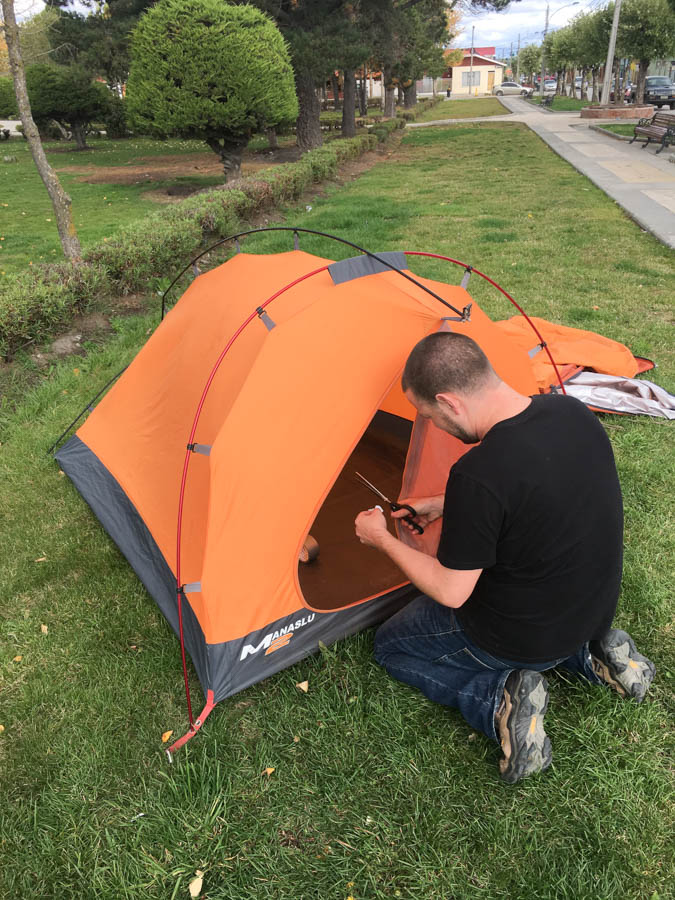
- Waterproof tent (the lighter the better)
- Sleeping bag (-6 comfort level)
- Sleeping mat
- Mess kit (pots, cups, utensils, knife, etc.)
- Pocket stove with gas canister (2 canisters for a couple on the 8 day trek, cooking once / day)
- Lighter (or 2)
- Backpack with a good harness
- Trekking poles (it can be windy, and the terrain is tough. Poles keep you sturdy)
- Waterbottle (aluminum)
- Carabiners
- Camera with extra batteries
Toiletries:
- Sunscreen
- Bug spray
- Bandaids
- Antibiotic ointment
- Anti-inflammatory / pain-killer (Ibuprofen)
- Tensor bandage for joints
- Toothbrush & paste
- Small packet of shampoo & small soap
- Wet naps / baby wipes (in place of a shower!)
Food:
You’ll have to decide what kind of food you want to eat when trekking Torres del Painel. Go for lightweight meals, and food that you don’t have to cook. You’ll want to make sure you have lots of protein in your diet.
Plan to light the stove once / day in order to save on gas. I suggest cooking dinner on the stove and having breakfast and lunch foods that don’t need to be heated.
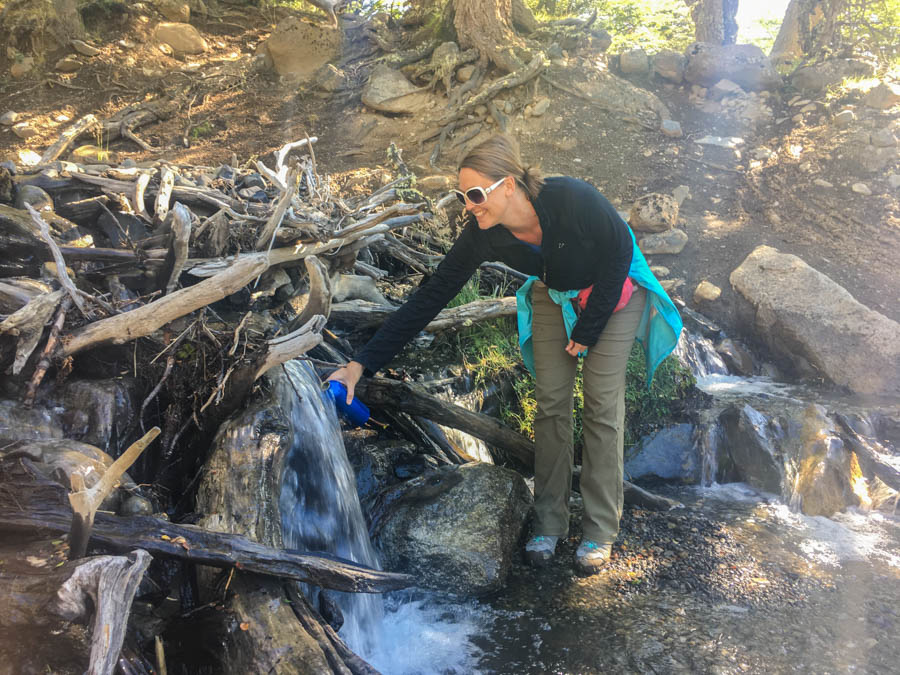
You can drink the water from the waterfalls, streams, rivers & taps at the camps. Don’t pack extra water. Patagonian glacier water is the best!
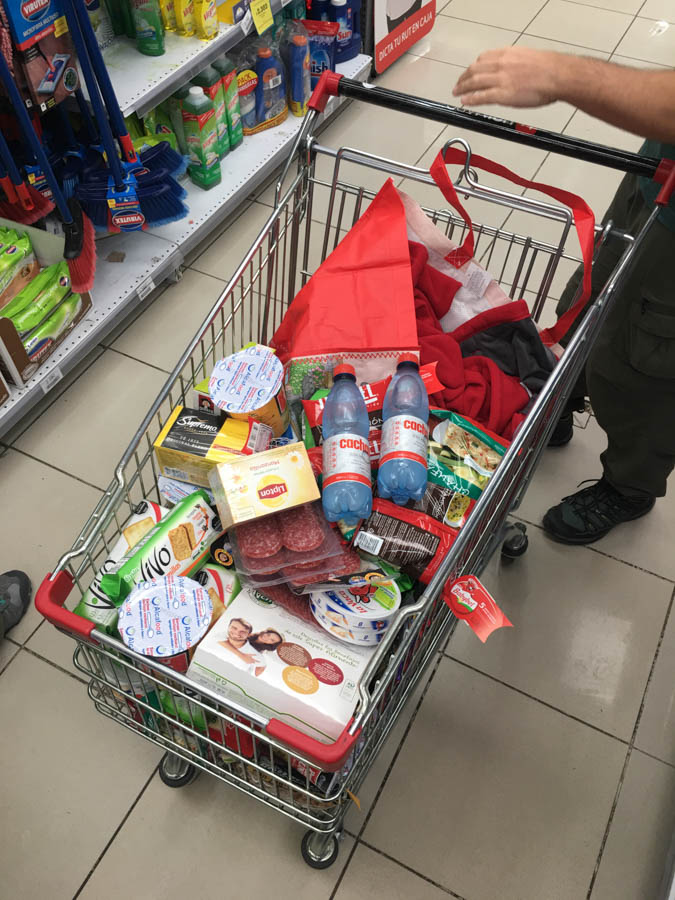
There is a great supermarket in Puerto Natales called UniMarc. Also, many of the trekking shops offer dehydrated meals and vacuum sealed foods as well. Dehydrated meals are around $20 each, while the vacuum sealed stews / curries are around $6 each. We purchased the vacuum sealed foods at Wild Hostel.
Some suggestions for food:
- Dehydrated meals (you just add hot water). More expensive, but worth it for how light they are, and easy to make.
- Vacuum sealed stews (available in Puerto Natales)
- Individual packets of rice with seasoning / dried veg
- Instant mashed potatoes
- Salami
- Babybel cheese
- Happy Cow cheese
- Crackers
- Oats / Museli
- Oatmeal (only issue is that you need to boil hot water and might not want to in the morning)
- Powdered milk
- Tea / hot chocolate
- Trail mix (nuts, dried fruit, M&M’s)
- Snickers bars
- Granola bars
- Booze (rum, whiskey, pisco) this will keep you warm at night. Ditch the glass bottle and pour the alcohol in a plastic bottle to save on weight.
The name of the game is lightweight and small in size. Trust me, when you’re trekking up a mountain at 6:00am in the pitch black, you’ll be cursing the weight on your back if your bag isn’t light enough. Also, keep in mind that you’ll want to have a lot of protein in your diet.
Make sure to have enough cash on you for the duration of your trekking and camping trip. You’ll want money for the entrance fee (21,000 pesos), shuttle bus (3,000 pesos), and potentially some food along the way.
Packing Tips for Torres del Paine
Keeping the contents of your backpack dry is the most important thing. It doesn’t matter if the outside of your pack is getting soaked, as long as your sleeping bag and nighttime clothing are dry.
In order to keep everything from getting soaked, we recommend lining your pack with black garbage bags (double up). Or, get yourself a waterproof bag liner. Then, pack everything in individual bags (inside of the bag liner) to ensure they stay dry.

Zip-Loc bags are great for keeping electronics dry as well, plus, they are see through meaning it’ll be easy to find what you’re looking for.
If it’s windy (and it most likely will be), your backpack rain cover will be useless and will just blow off of your pack. Leave it behind.
Only bring what you need. Get a small tube of toothpaste, only have one outfit for trekking and don’t bother with “luxuries”. You want your pack to be as lightweight as possible!
You can leave all of the items that you don’t need in Puerto Natales. Check with your guesthouse / hostel about the costs of their storage. And, make sure that where you’ll be leaving your belongings is a safe place, preferably with lockers. We left our belongings at Kaluve Patagonia Guesthouse, which cost us $2 / day for 1 locker and we were able to fit everything into one.
If you stay at the guesthouse when you return from the trek, the lockers are free.
Regarding food, make sure to take everything out of unnecessary packaging. Transfer everything to Zip-Loc bags where possible. Every little bit of packaging adds weight to your pack.
Renting vs. Buying Your Gear
If you have your own camping and trekking gear with you, then you’re all set. You’ll be familiar with your kit and know that it works for you. But, if you’re on a long trip and can’t carry camping gear with you, or you’ve decided to do the trek at the last-minute, you can buy or rent your gear in Chile.
We don’t recommend purchasing any trekking or camping gear in Argentina, as the prices we found in Chile were cheaper.
In Santiago, there is a mall called Sky Mall. Here you’ll find all of the brand name stores – Columbia, Merrell, Doite, North Face, etc. I purchased some really good hiking boots from Merrell and they withstood all of the elements on the circuit. The price was the same as it would have been in the United States.
Many people find themselves in Punta Arenas before making their way to Puerto Natales to start the trek. If you’re one of those people, you could consider spending the night in Punta Arenas and doing some shopping in the Tax-Free Zone.
Basically, there is a huge area in the city that has a lot of shops that offer cheap prices on many items. In particular, outdoor gear which is perfect for trekking Torres del Paine. Check out Balfer, here you’ll be able to buy a tent, sleeping bag, sleeping mat, jackets, mess kit, trekking poles, etc. You name it, you can buy it.
If you aren’t going to Punta Arenas, then you can still buy a lot of gear in Puerto Natales. We were surprised at just how low the costs were! This is the last place you can purchase items for trekking and camping, yet, the prices were very reasonable. There isn’t as much variety as Punta Arenas, and it’s not quite as cheap, but it’s still surprisingly affordable.
Be warned though, that almost all trekking shops in Puerto Natales are closed on Sundays. There is 1 grocery store that is open (Uni Marc), but that’s basically it.
If you would rather rent your camping equipment, you can do that at Erratic Rock and at many of the hostels around town. Erratic Rock is the most popular spot, but that also means that their gear is more worn than other places.
We rented our tent from Erratic Rock and we had to set up 5 tents in order to find one that didn’t have a hole in it! I also rented a sleeping bag from them. Thankfully, both the tent and the bag held up well on the O circuit trek.
Itinerary For the “O” Circuit Trek
The trek route and times will be based on how fast you are, how many kilometers you want to walk in a day, and how much money you want to spend on campsites.
Here is the itinerary we opted for during our 7 night, 8 day trek in Torres del Paine, complete with our trekking times. Note, we are “medium speed” trekkers, not fast, but not slow.
Day #1
- Las Torres Hotel -> Serón Camp
- Distance: 13 kilometers, 4.5 – 5 hours
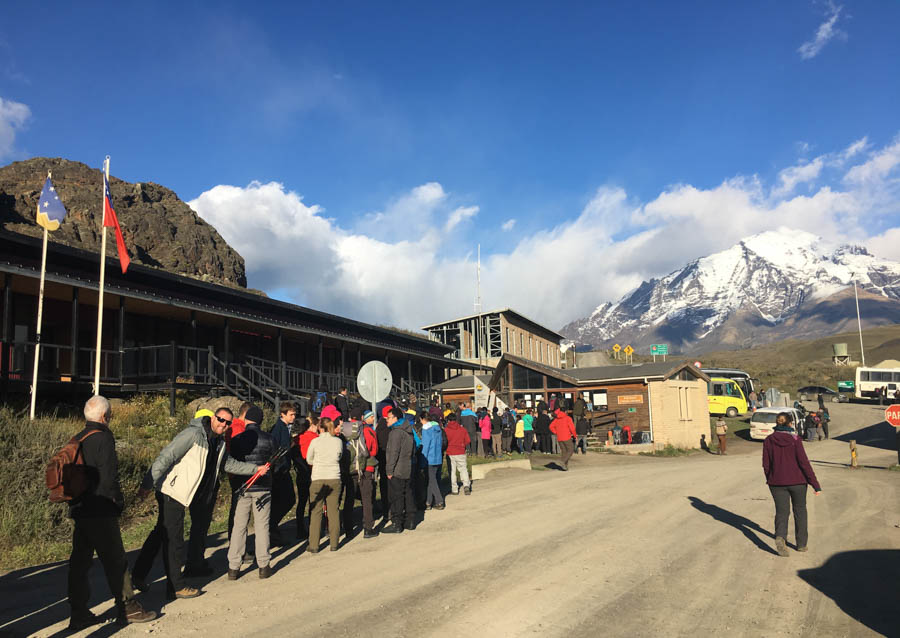
Coming from Puerto Natales, you’ll arrive at the entrance to the National Park after a 2 hour bus ride (ticket cost 15,000 pesos return, keep your ticket!). At the entrance, you’ll wait in line to fill out a form, pay your entrance fee to the park (21,000 pesos) and wait for a shuttle bus (3,000 pesos) to fill up and take you to the Las Torres Hotel where you’ll begin the trek.
Today, you’ll start trekking from around 11:30am, if you catch the 7:30am bus from Puerto Natales.
The walk is 13 kilometers long and it took us 5 hours, including stops for photos and (somehow) taking a wrong trail for a few minutes.
This is an easy trekking day, perfect for getting used to your gear and having weight on your back. Arriving at camp around 4:00 / 4:30pm, you’ll have lots of daylight for setting up your tent.
Day #2
- Serón Camp to Dickson Camp
- Duration:19 kilometers, 7 hours 45 minutes
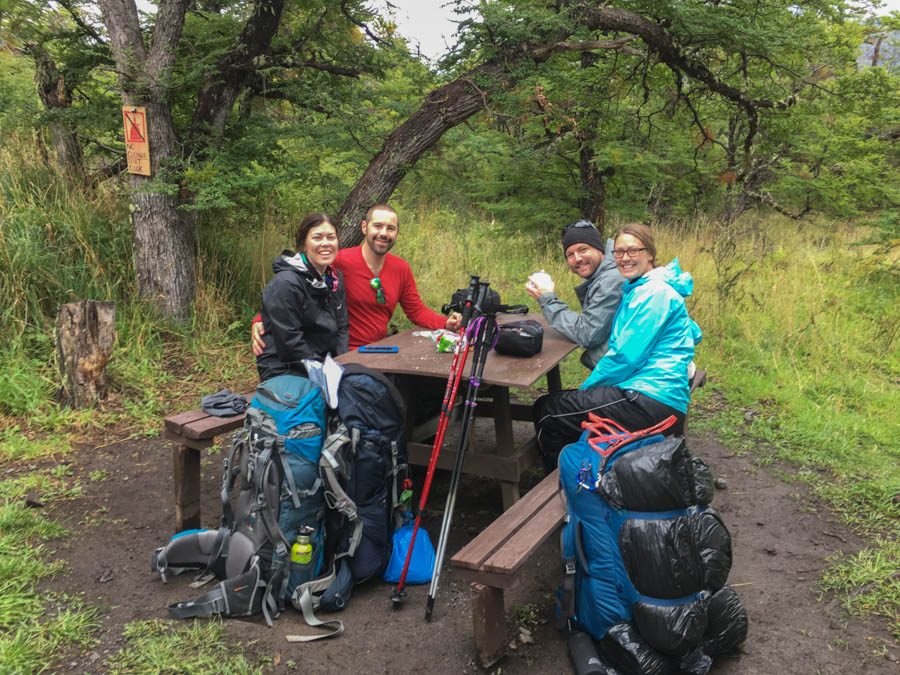
You’ll head out from the camp through some meadows and small hills before arriving at a fairly steep incline that goes up 100m in elevation. Continue hiking down a narrow path on the side of the mountain. Winds can be strong here, watch your footing. You’ll trek past a beautiful lake and waterfall before arriving at the Coirón Ranger Station, which is the halfway point of the day.
You need to check in here by signing a book. There are some picnic tables and a bathroom, making it a great stop for lunch.
From Coirón, it’s fairly flat before one final ascent, and then a descent to Dickson Camp. Depending on weather, today’s trek can be easy or a bit difficult. We had lots of mud this day and we all felt exhausted. The map said it would take 6 hours and we know of people who have done it in 5 hours. But it took us almost 8 hours! Weather plays a huge role in trekking times.
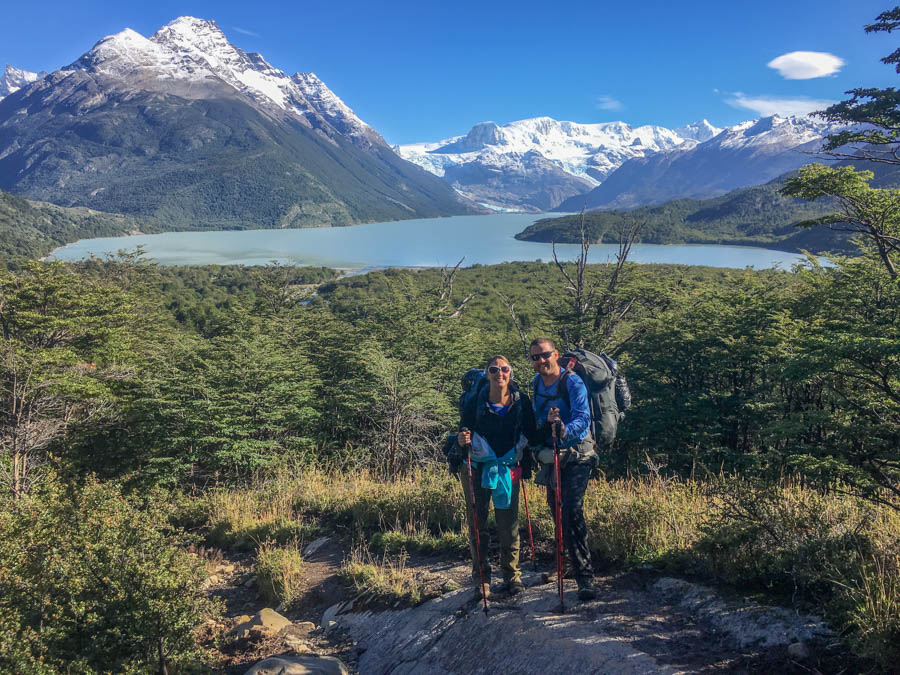
Arriving at Dickson you’ll be greeted with amazing views of the mountains. Make sure to head behind the camp on the obvious trail to visit the lake and glacier.
Day #3
- Dickson Camp to Los Perros
- Duration: 11 kilometers, 6 hours
This day is a very picturesque one. Heading out of camp, you’ll make an ascent right away. Make sure to look behind you because you’ll have fantastic views of Dickson Lake and the Escondido Valley, with glaciers!
Continuing on, you’ll arrive in a forest where you’ll trek for quite a while. Keep your eyes peeled for woodpeckers. After another ascent, you’ll come to a clearing with fantastic views of the backside of the Tower Mountains. From here, you’ll trek for a while with great views of the Valle de los Perros.
You’ll head back into the trees and alongside a river, before eventually making another ascent and arriving at the Los Perros glacier and lake. This sight is just before the Los Perros campground, you can’t miss it.
You’ll want to arrive relatively early at camp so you have enough daylight to set up your tent. Los Perros is surrounded by mountains, meaning the sun sets sooner than in other camps. We arrived at 4:30pm and had enough light.
Day #4
- Los Perros to Paso Camp
- Duration: 8 kilometers, 6 hours
Today is the day you’ll be trekking over the John Gardner pass at 1,200m. You’ll be starting at around 600m, so the gain in elevation is roughly 600m. You need to set off around 7:00am because weather on the pass can change in an instant. Generally, weather conditions are better in the morning when trekking Torres del Paine.
With your headlamp to guide you in the dark, you’ll begin ascending. You’ll head through the forest for a while before coming out to a gravelly area filled with large and small boulders. From here, you begin climbing even higher to reach the saddle of the pass.
During the final ascent, you’ll have fantastic views of mountains and a glacier on your righthand side.

Hopefully the weather is on your side because the views from the top of the pass are outstanding! On a sunny day, you’ll be greeted with the vast Glacier Grey, which is dominated by numerous snow-capped mountains. If it’s not windy, snowing or raining, stick around and admire the views.
After that, you have a massive descent, which is hard on the knees and can be quite slow going.
You’ll have to check in at Paso Camp and start setting up your tent. Be careful of cheeky foxes here, they’re cute, but they steal food and shoes!
Day #5
- Paso Camp to Paine Grande
- 18 kilometers, 8 hours (9.5 hours including the Glacier Grey Mirador, lunch and other lookout points)
This day is a long one, and actually, having now done the trek, we would suggest staying at Grey Camp to break up this day. Making the trip 8 nights, 9 days.
Leaving Paso Camp, you have an amazing view and lookout point of Grey Glacier and the mountains. Stop off for a few photos and continue on. There is a lot of “up” on this hike, before descending down into the forest.
A new suspension bridge is currently being built, but in the meantime, you’ll have to cross a somewhat sketchy river by using boulders and rocks. Then, hike up a ladder to get away from the river.

After hiking through the forest for a little bit, you’ll arrive at a sign for a Mirador of Glacier Grey. Drop your backpack here at the sign and head up through the little path about 5 minutes (bring something warm to wear). Here you’ll be closer to the front of the glacier.
Continuing on, you’ll arrive at 2 suspension bridges. If you’re scared of heights, this might be a bit difficult for you. The highest and longest bridge is 80m high, and 50m long. If it’s windy, make sure to hold on tight and be extra careful. There are great views of the glacier from the bridge.

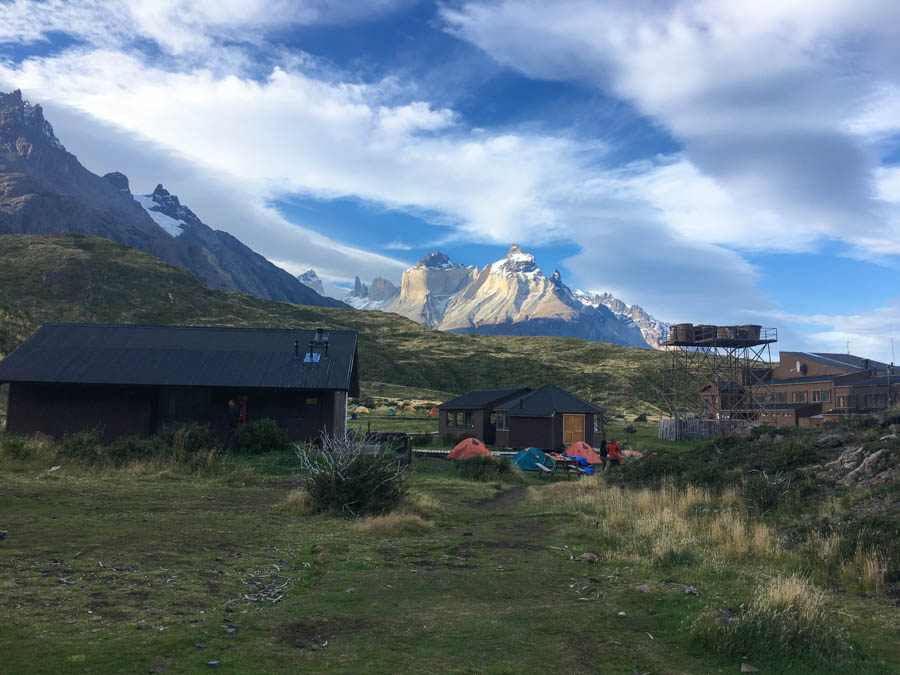
After the bridge, you’ll be in the forest for a while. Again, keep your eyes peeled for woodpeckers. Eventually, you’ll arrive at another Mirador of Glacier Grey, and Grey Camp. We highly recommend walking along the trail (about 15 mins) to the lookout points. This is a great spot to have lunch, and if you’re lucky, you’ll see a chunk of the glacier crack off and land in the water!
If you’re staying at Grey Camp, drop your bags, set up your tent and go and visit this lookout. If you’re continuing on to Paine Grande (like we did), you can either leave your packs at the entrance to the mirador, or bring them with you. Because there are a lot of people on this portion of the trek, many of which are day-trippers, we opted to bring our packs with us.
It’s 4 – 5 hours from Paso Camp to Grey Camp. From Grey Camp to Paine Grande, it’s another 4 or so hours.
After the Glacier Grey Mirador, you’ll now be on the “W” portion of the hike. You’ll notice it right away as there will be many more people on the trail. From Grey Camp to Paine Grande, you’ll have a couple of fairly steep ascents, and views of Lake Grey, waterfalls and snow-capped mountains.
Check-in at Paine Grande and set up your tent. There are foxes here as well, so be mindful of your belongings.
Day #6
- Paine Grande Camp to Italiano
- 7.5 kilometers, 2.5 hours
- Italiano to Británico Lookout – 5.5 kilometers, 3 hours, 1 way
The hike from Paine Grande to Italiano is short and easy. But, you won’t want to leave Paine Grande too late, because there are 2 must-see miradors near Italiano Camp – Francés Lookout and Británico Lookout.
Arriving at Italiano, check in with the rangers and find yourself a campsite. The plots here are dirt, rather than grass. You can get drinking water right from the main rushing river, just outside of the camp itself.
After setting up your tent, make your way up the Francés Valley. The first lookout point is the Francés lookout, followed by the Británico. It’s 1.5 hours from Italiano to the Francés lookout point, most of the way is an ascent. Coming back down, it’s about 45 minutes. To continue further on to Británico, it’s about another 1.5 hours up past Francés.
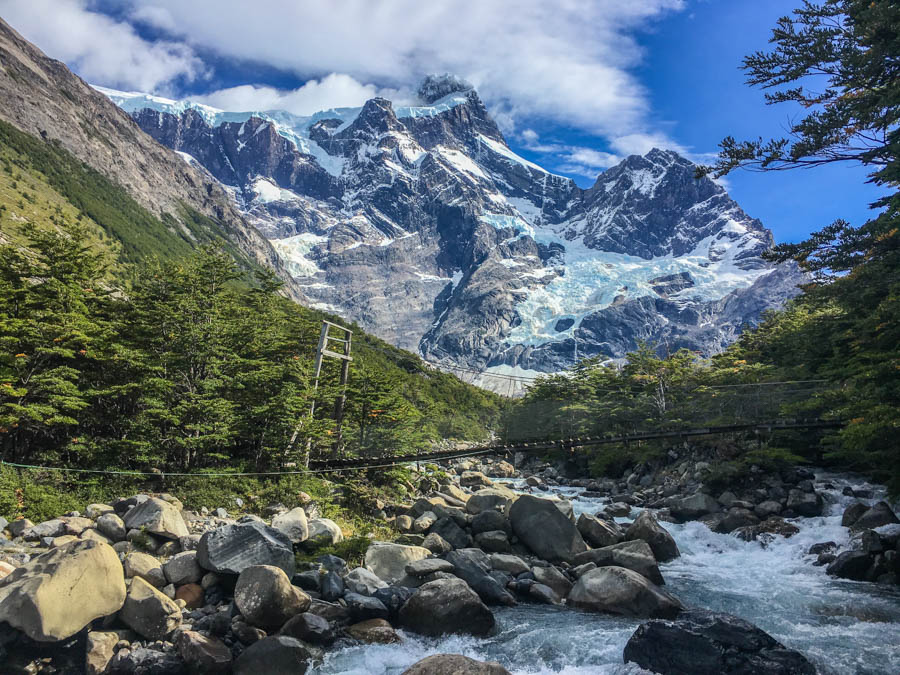
The views of the Francés Glacier and towering mountains are spectacular.
In reality, the whole valley offers really nice scenery, so if you’re too tired to continue on, don’t feel like you must make it to the end.
Day #7
- Italiano to Torres Ranger Station
- 19 kilometers (approximately), 7 hours 40 minutes (we were extra fast this day. Most people do it in 10 hours)
This was a day that we were dreading the entire trek. We were told by rangers and hikers that this day was “going to be a big one”, and that it could potentially take us 13 hours to arrive at Torres Ranger Station.
Well, we did it in 7 hours and 40 minutes! And, friends of ours (who had very sore knees) arrived in 10 hours.
We set off from Italiano in the dark at 6:00am. This was one of the most amazing experiences. The trail was quiet and the moon was shining against the mountains and glacier. The sunrise over Nordenskjold Lake was incredible!
From Italiano, you’ll wander through an easy path before a descent down towards the lake. The views here are amazing. Walk along the rocky beach, cross the river and continue on. There are a few ascents today and loads of lookout points.
The trail to Chileno Camp is quite narrow and steep, and once you reach the gorge, you may get some vertigo if you look down! From Chileno Camp to the Torres Ranger Station, it’s nothing but uphill.
Scenery-wise, this is one of the best days of trekking Torres del Paine.
Day #8
- Torres Ranger Station, to Base de las Torres, to Las Torres Hotel
- 1.5 kilometers, 1 hour from Torres Ranger Station to Base de las Torres Lookout
- 8 kilometers, 2 hours 45 minutes from Torres Mirador to Las Torres Hotel
This is the final day! Wake up bright and early to start your ascent to the Base de las Torres lookout. The time of sunrise depends on the time of year that you are trekking Torres del Paine. We trekked from March 13 – 20th and the sunrise was around 7:15am.
Today, you can leave your tent and your belongings at camp and climb without a backpack because you’ll be returning to the camp after the lookout point. This is normal, everyone does it.
We brought a backpack with water, breakfast, tea, warm clothing and sleeping mats to sit on.
It’ll be dark when you start climbing so bring your headlamp.
Even if it is raining, head up to the Torres. It was raining when we arrived at the towers and the mountains were completely surrounded by clouds. But, after 1 hour, the clouds parted and we had pure blue sky! The weather changes so fast in Patagonia.
After you get all of the photos and videos that you want, start making your way back down to Torres Ranger Station. Keeping in mind that it’s about a 3 hour trip down to Las Torres Hotel, and that the shuttle bus leaves at 1:45 / 2:00pm to take you to the entrance where you’ll catch your bus back to Puerto Natales.
You’ll backtrack to Chileno Camp, up and over the narrow mountain trail, and then where the track splits, stay left and descend all the way down to Las Torres Hotel.
Health & Safety For Camping & Trekking Torres del Paine
Visiting Torres del Paine National Park and trekking the O circuit is definitely a bucket list item. This is one of the most amazing adventures we’ve been on.
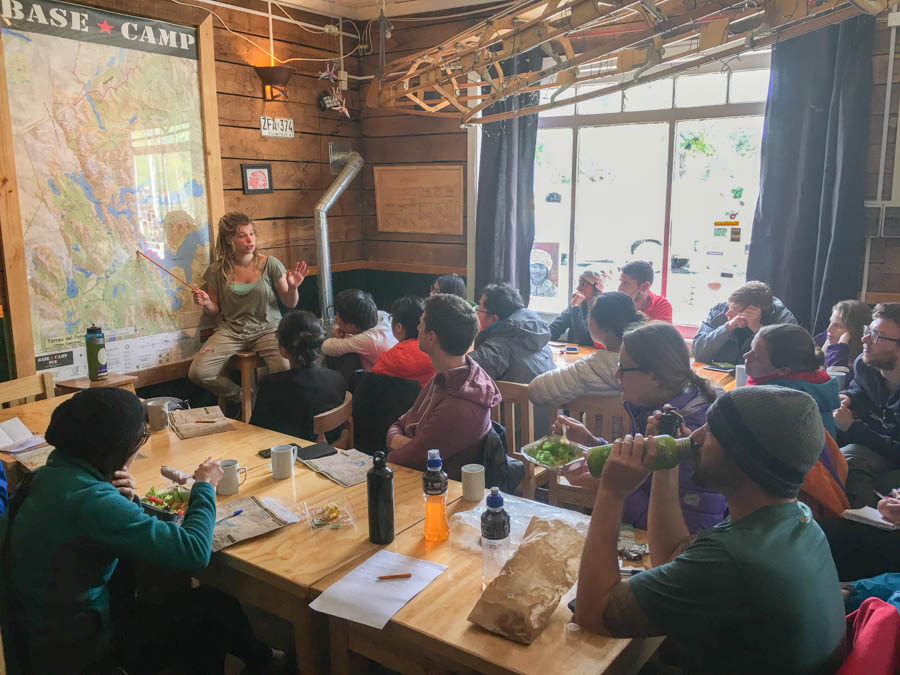
To ensure you have the safest and most enjoyable trip possible, make sure to visit Base Camp / Erratic Rock in Puerto Natales for their daily seminar at 3:00pm.
The expert guides and trekkers discuss everything you’ll need to know about hiking in Torres del Paine. They show you a map of the park, talk about various routes, the do’s and don’t’s, offer some tips and advice, and they have a Q&A session as well.
While you’re in the park, only use the bathrooms that are available, don’t do your business on the trail. But, if it’s an emergency and you MUST go, then make sure to dig a hole, do your business, cover up the hole, put some rocks on top and bring your toilet paper with you. Also make sure you are well away from any rivers.
Regarding garbage, you must bring out what you bring into the park. So when you’re packing your food, consider leaving behind as much of the plastic as possible. Having said this, at Serrón Camp, there are garbage cans, and at Paine Grande Camp as well. Both of these camps have easy access to bring the garbage out of the park. The rest of the camps don’t, so please bring your garbage out with you.
The water is drinkable everywhere. Obviously, however, you wouldn’t drink from a river right in a camp, head away from people to find your water source. Bringing a steri-pen or iodine tablets isn’t necessary. Let’s help to keep it that way.
We also highly recommend that you have travel insurance before embarking on this adventure. World Nomads covers adventurous activities, such as trekking and camping out in the wilderness and emergency evacuation. Always do your research and find the best insurance policy for the activities you plan to do. Enter your information below to receive a free quote from World Nomads:
Final Thoughts & Advice
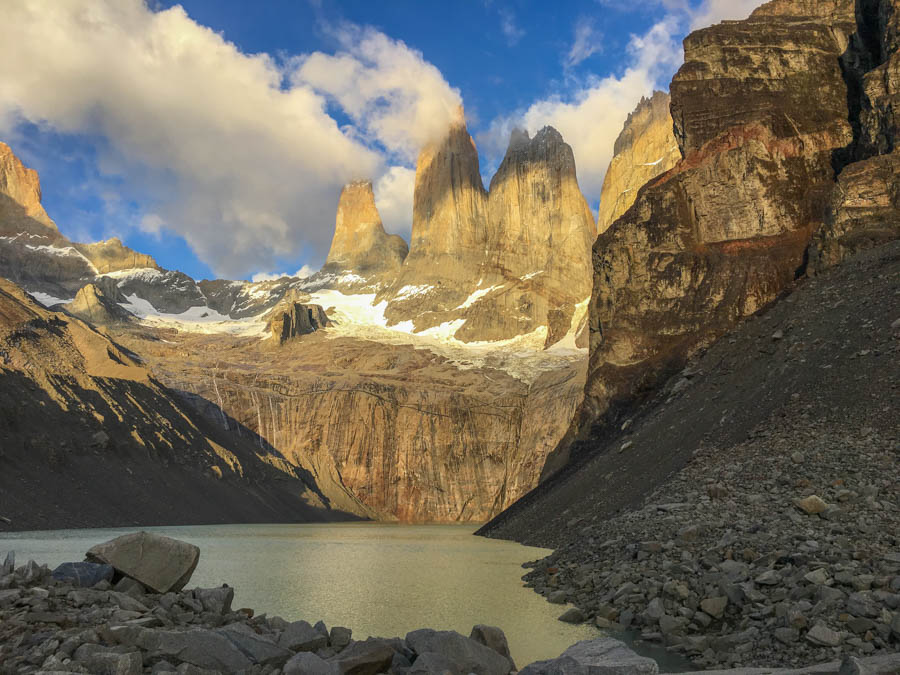
You may have seen some amazing natural beauty in the past, but trust me, your eyes will be on scenery overload here at Torres del Paine! This UNESCO listed Biosphere is one of the most unusual places on earth. Everywhere you look is an incredible feat of nature.
If you are well prepared and have the proper clothing and food rations, you will have a great experience. There will be rain, but there will also be sun. Keep an open mind and a positive spirit on the trail.
We hope that this guide to Trekking Torres del Paine gave you some useful advice and tips for your journey. Happy hiking and camping 😀
Be sure to read about our personal experience on the O Trek and also check out Backpacker Steve for more info on Torres del Paine National Park.
Finally, check out our videos from our trek in Torres del Paine!
Like This Article? Pin it!