Design plays a very important role in the way we consume information, especially when it comes to travel blogs where the audiences are looking for specific information in a timely manner. With a well-designed travel blog, the audience can get the information in seconds which in turn will form a habit of visiting the site more often.
On the other hand, a poorly designed travel blog can leave the audience confused, forming a bad opinion and abandoning your blog altogether.
According to the research, your audience will look at the visual appeal of your travel blog and form an opinion as quickly as within 500 milliseconds after the page loads! Unfortunately, most travel blogs do not prioritize design in their early stages, and as the blog grows, the design is often put on the back burner and forgotten altogether.
No matter how interesting and unique your content is, if your audience is not fond of the reading experience your travel blog offers, they will not hesitate to leave your website and switch to other alternatives.
I have been working as a freelance user interface designer for more than 10 years now, and I have recently experimented with redesigning my own travel blog BucketListly.Blog and learned a lot about how to create a great reading experience.
☞ See Also: Travel Jobs – A List of 101 Jobs You Can Do Remotely
Today I’ll share with you the top 10 most important design tips you can apply to improve the reading experience of your travel blog.
1. Simplify Your Navigation
As I mentioned before, it’s important that your website provides the information your audience needs as fast as you can and by having a simple and clear navigation, this will allow your audience to be able to jump around and explore your website easier.
Limiting your navigation structure to be no more than 2 levels, with simple and clear labels that are accessible at the top of the page is one way to simplify your travel blog. Also, according to Google, the depth of your content can determine how well your articles rank. If it takes one click to get to a page, then Google would consider the page more important than others that take two or three clicks to get to.
Want to learn How To Start a Travel Blog? We can show you how in just a few minutes and to get you started, we’ll send you our 4-Part Beginner Blogger Video Course & our 200-page blogging ebook for free! Click Here to learn more.
2. Content-Focused Layout
If you arrive on a page and your eyes go automatically to something else other than the content, then the website owner is doing it wrong. Travel blogs live and die by their content and it’s important to pick a layout that focuses on the content instead of other unrelated things like marketing or ads.
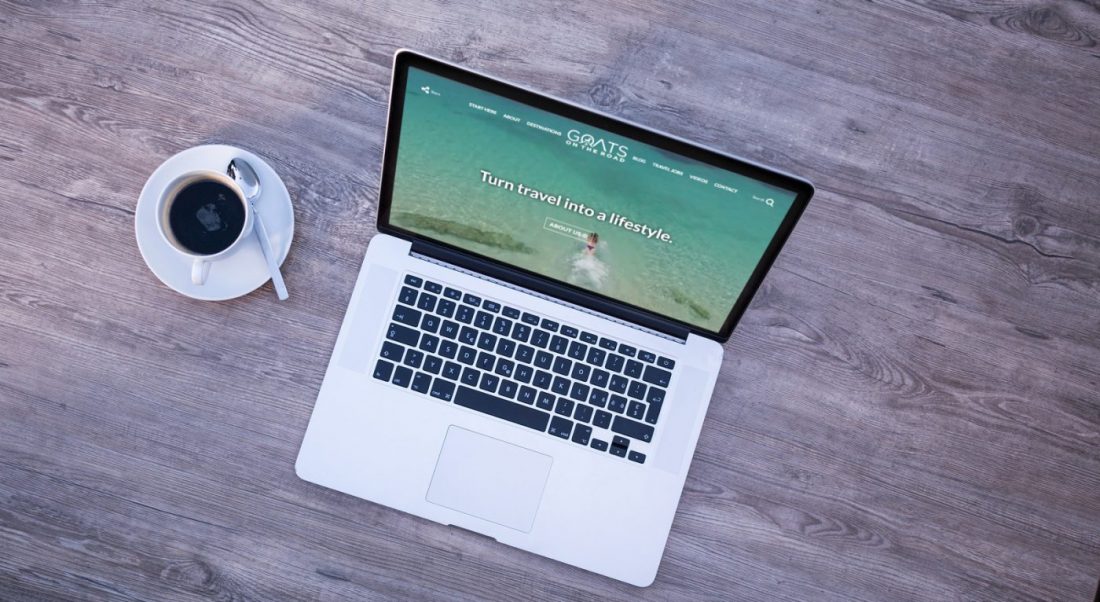
The best layout for the content is the single column layout seen here on Goats On The Road. The content is front and center, easily digested with almost no distraction. There is no need for the user to think about where the content is. They see the page and they know immediately where it is.
The two column layout is also acceptable with the content on the left and a sidebar on the right. If you choose to go this way, make sure that the content column is significantly bigger than the sidebar so you don’t confuse the audience.
I found that the content area with the minimum width of 800px or more to a 300px sidebar is a good balance that gives the content center stage while leaving some room for the sidebar.
3. Optimize Images
More often than not, your travel blog will be accessible from a mobile phone via limited mobile data and since travel content are often heavy on images, it’s important that you optimize your photos properly before you upload them so your post will load faster and you don’t waste the audience’s limited mobile data.
You can optimize your images through 3rd party services like TinyPNG or Optimizilla before you upload or you can do it manually with Adobe Photoshop if you need more control over the settings. The most optimum settings I found is to convert the photos to JPEG with 60% quality. The quality may vary depending on the type of photos you have so feel free to experiment with the number.
4. Lazy Load Everything

Lazy load is a design pattern commonly used by websites with heavy content to defer initialization of images or iframes until the point at which it is needed.
As mentioned above, mobile data and speed are precious to your audience and due to the nature of the travel content, you should lazy load all your photos, Youtube videos and Google Maps embeds in order to not waste your server resources and the audience data, and in turn speed up your travel blog’s initial load time immensely.
To implement this on your travel blog, you will need a little javascript development skill or a web developer to help you with. A plugin I would recommend is Verlok’s Lazy Load script which is easy to implement, lightweight and powerful.
☞ See Also: 10 Free WordPress Plugins Every Travel Blog Should Have
You can take it a step further like I did with BucketListly Blog by combining lazy load with small placeholder images and “srcset” attribute.
This is how it works: You will need 3 versions of the same images, one for placeholder (20 pixels wide with 20% quality), one for the mobile version (500 pixels wide with 60% quality), and the original photo.
When the page first starts loading, a placeholder version will be loaded first as a placeholder and the original image will be loaded only when your audience scroll to it. If you want the images to load a smaller version depending on your audience screen size, you can use the srcset attribute on your image HTML tag by putting the mobile version of the image inside the srcset attribute. You can learn more about srcset here.
5. Easy Access to the Search Button
The search feature is one of the most important features a travel blog could have. When your audience arrive on your blog and they couldn’t find what they want on that page, the next thing they will do is to look for a search button to dive down further.
More often than not, they will look for it up at your navigation bar and If they couldn’t find a search button, they will most likely leave your website so be sure to have the search feature ready at the top of your page sitewide.
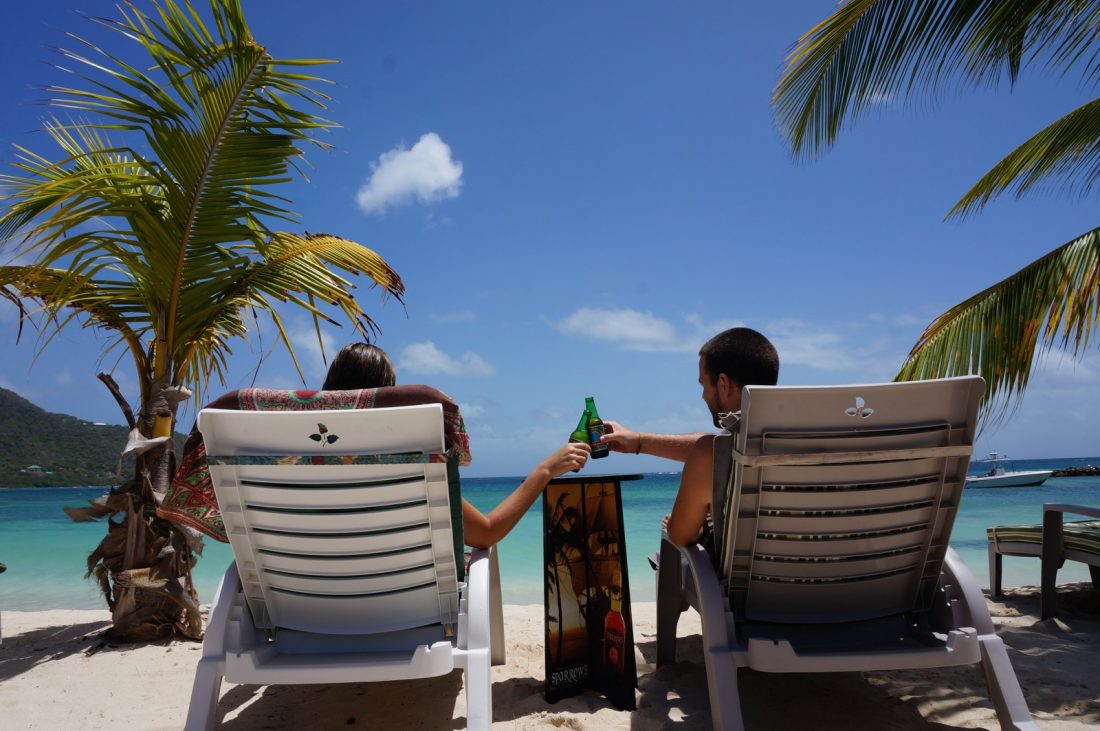
6. Improve Your Photography

I took this when I was hiking the Balcon Sud trail in the French Alps.
You can improve your audience reading experience by upping your photography game. Visual aids are a big component in a travel content and with well-framed photos to accompany your blog post, the audience will more likely to engage with that post if they like the photography in it. After all, we humans are visual creatures.
Blurry, low-quality photos may give the impression that your content is low quality so don’t let that hinder your storytelling.
7. Don’t Sacrifice Design Over Marketing
I have seen too many bloggers make the mistake of sacrificing good reading experience with countless annoying popups and banners for the sake of marketing. The most common mistake I see is when I arrive on a page, looking for a specific information and a full-page popup appear asking me to subscribe to their newsletter even before I had a chance to read the content. That is a sure way to lose an audience.
It’s best to avoid using any kind of marketing strategies that get in the way of your audience and the content they are looking for.
8. Keep Fancy Fonts to a Minimum

Having a fancy font as part of your blog design is a great way to make your blog stand out from the generic ones, but don’t overuse it. I’ve seen many travel blogs that went above and beyond with the fonts, making it almost impossible to figure out what the blog post was about due to the poor legibility of the font they used.
Keep fancy fonts to a minimum. A good rule of thumb is if you want to use fancy fonts, limit it to one and use it on the big headline only. Choose a more legible font for your content like Open Sans or Helvetica for a better reading experience.
9. Structure Your Content Consistently
When creating content for your travel blog, make sure that you have a clear structure in your mind and use the right style to reflect it consistently throughout your blog.
A title should look like a title with the most prominent font size, weight, and colors. Same goes for the header text with a smaller font size than the title and same bold weight whereas the body text should have the smallest font size and a normal font weight.
If you know some HTML, a good rule of thumb is to use H1 tag as the title, H2 as the subtitle, H3 as a headline, H4 as a sub-headline and P for paragraphs.
10. Limit Floating Content
As mentioned before, your audience is likely to arrive at your blog from a mobile phone and with such a limited screen real estate, it would only annoy your audience more if you have a floating box covering 15% of the screen.
Consider this, if you have a travel blog with a fixed top navigation bar, you are already taking up 15% of your audience screen real estate, and if you decided to put ads at the bottom that takes another 15%. This means you are only leaving only 70% of the screen for your content. If you add a landscape size image, this might take up 50%, and then you’ll leave no room for your audience to read anything unless they scroll down past the photo.
This just creates unnecessary annoyance to your audience. Keep your mobile audience in mind and limit floating content on your travel blog.
Are you running a travel blog as well? How many of these techniques have you applied on your blog? Did I miss anything from the list? Share with us in the comments below so we can help each other make the travel blog industry a little prettier.
Like This Article? Pin it!